So this is the lovely Madame de Montreuil wallpaper from Les Indiennes that I wanted for the master bathroom. No real reason not to get it, other than its high price and its durability in a small bathroom with poor ventilation, but I also liked the idea of a challenge in creating something similar on my own.
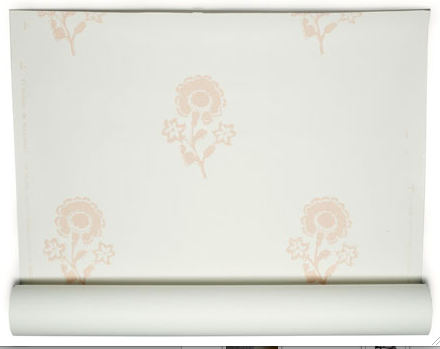
So those of you who have been following for a while know that in Singapore in March of 2011 I purchased these traditional floral Indian wood blocks designed to print fabric with the intent of making my own “wallpaper” in the bathroom. Like any project, there is always some other work that needs to come first and I had been waiting on the installation of the pocket door in this earlier post.
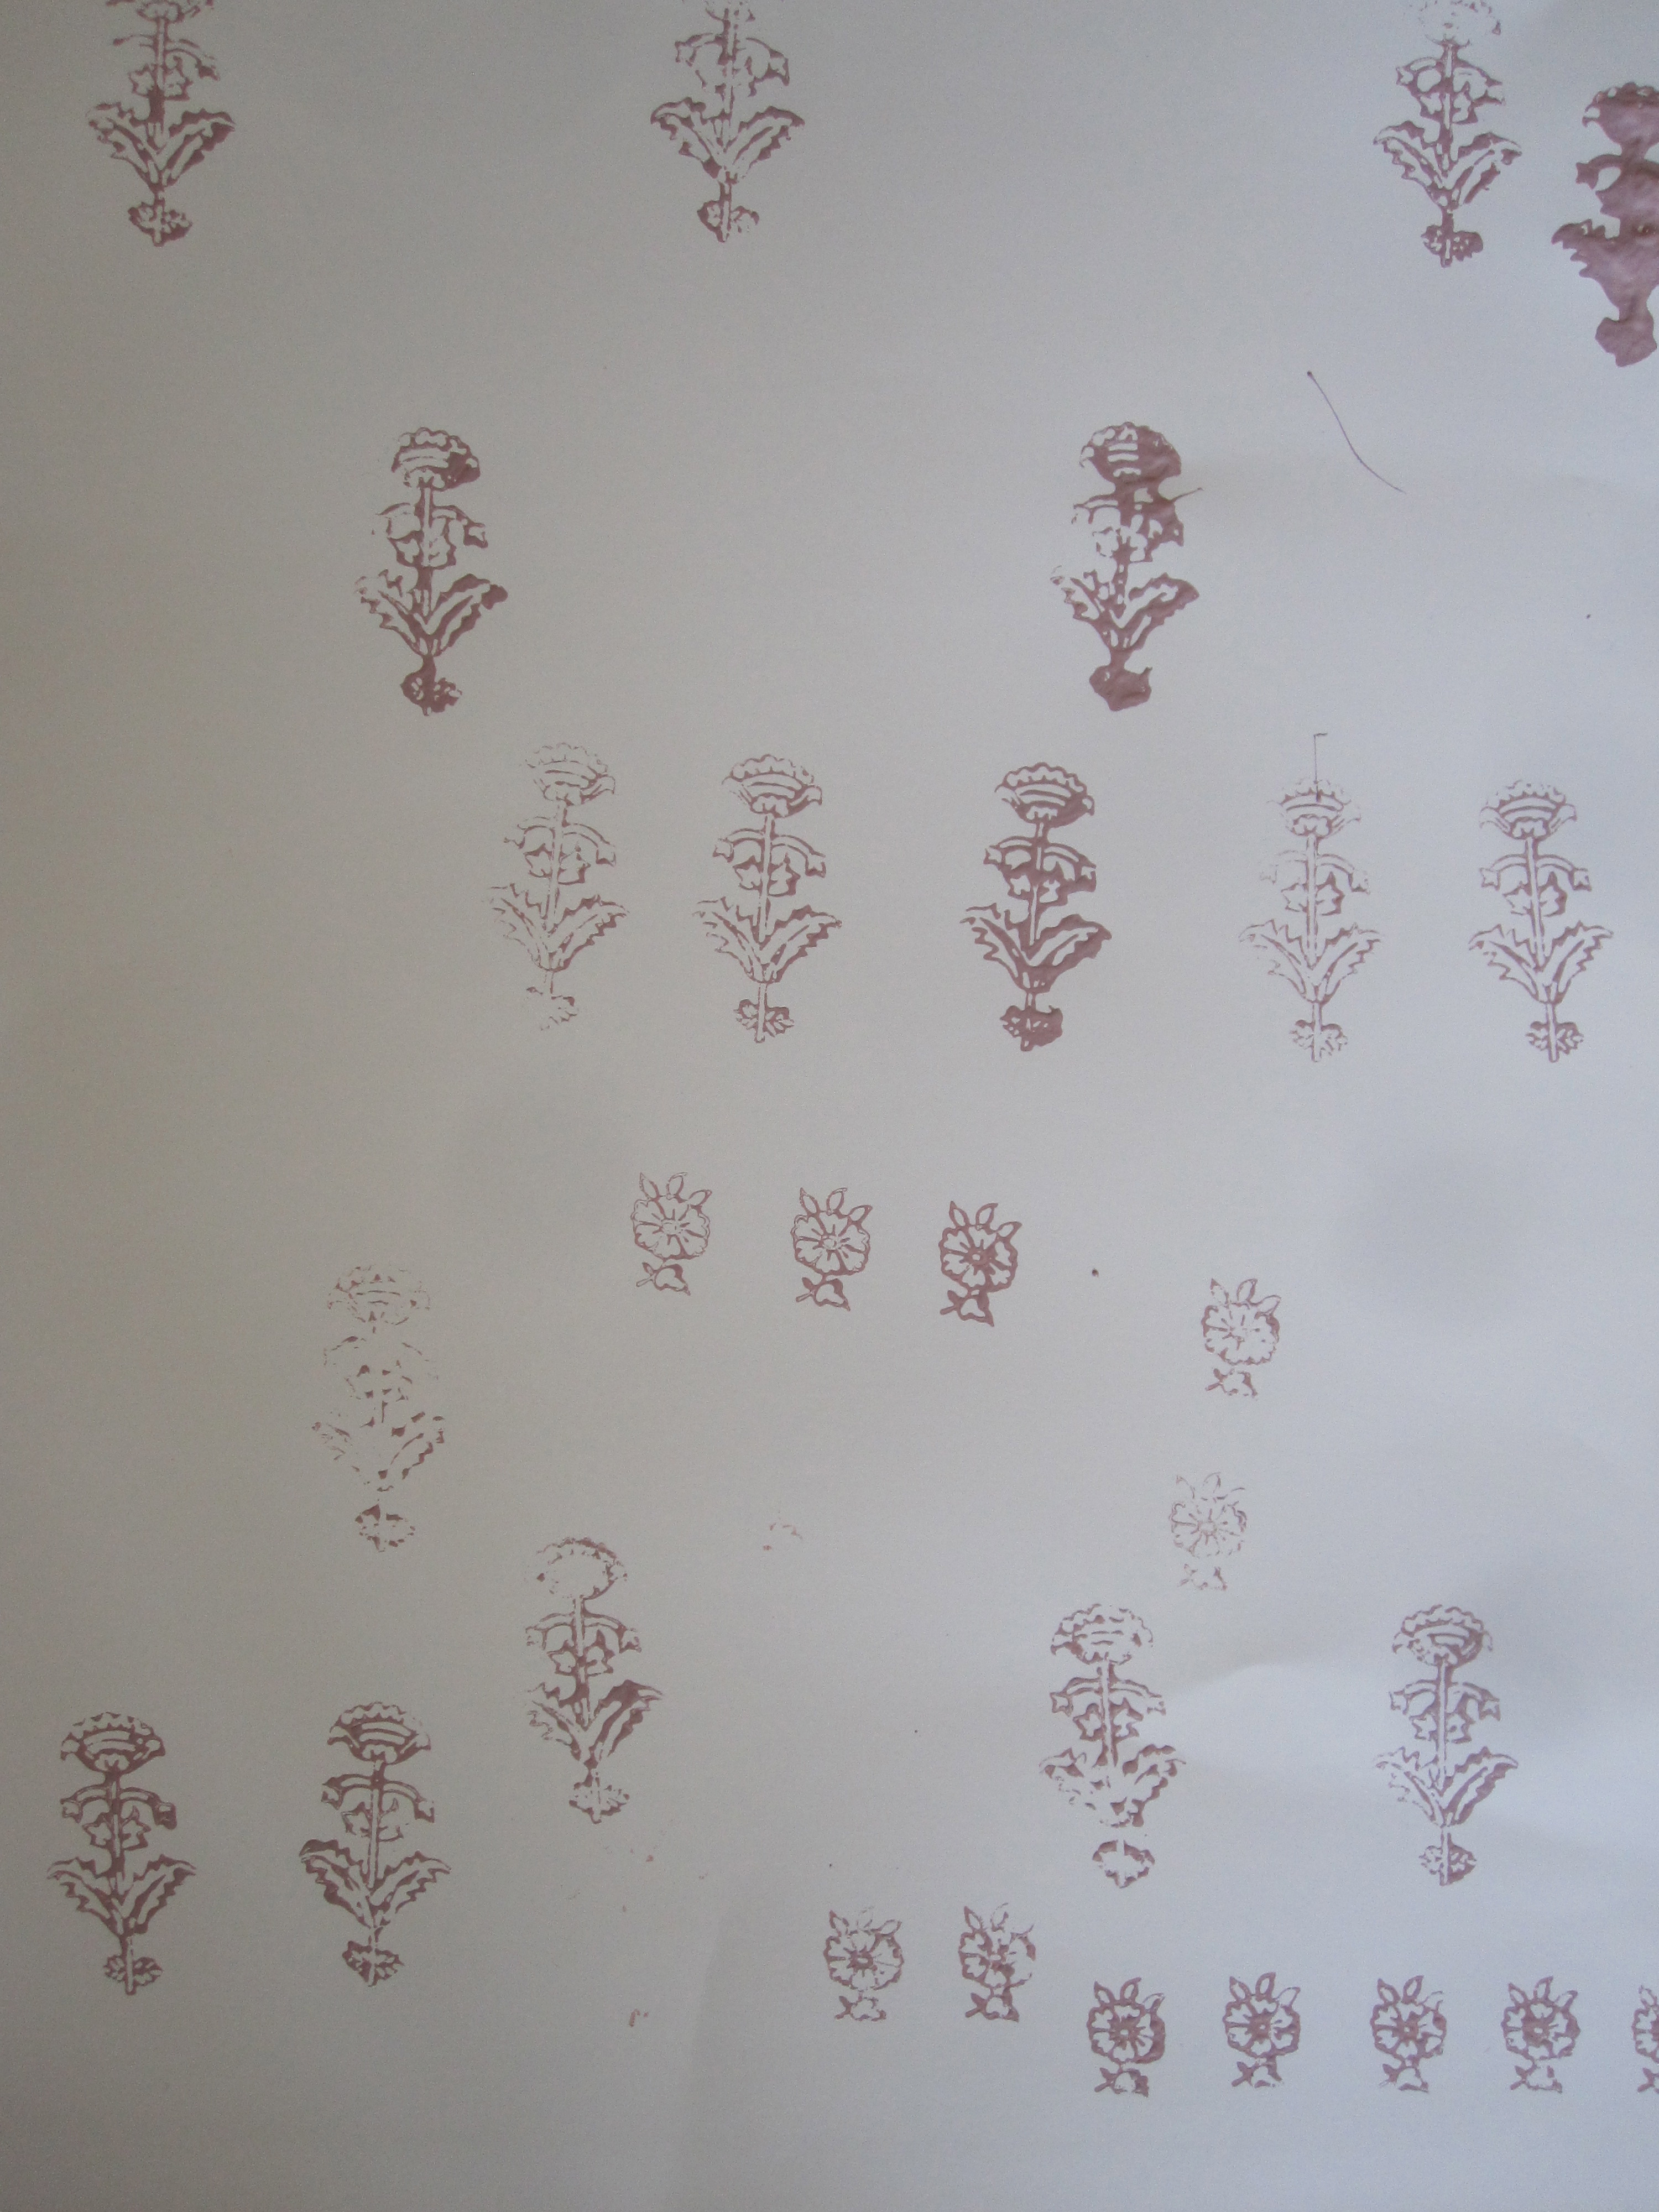
So with that finally done and the sheetrock repaired and painted in BM White Dove as the base background, I bought paint and poster paper, set up a workspace and got to work practicing my block printing technique. Wow, it was so much more difficult than I had imagined and my first attempts were just awful! I had too much paint in the tray and trouble figuring out how much blotting I needed to do before stamping. I was looking forward to an irregular organic look, but not this organic!
I wanted to try out different patterns so I did a dense one, which was waaaay too busy, but more importantly, made me realize that as this isn’t wallpaper, I don’t have a partial block print option and need to leave space between each row so it can finish cleanly around wall edges and the ceiling.
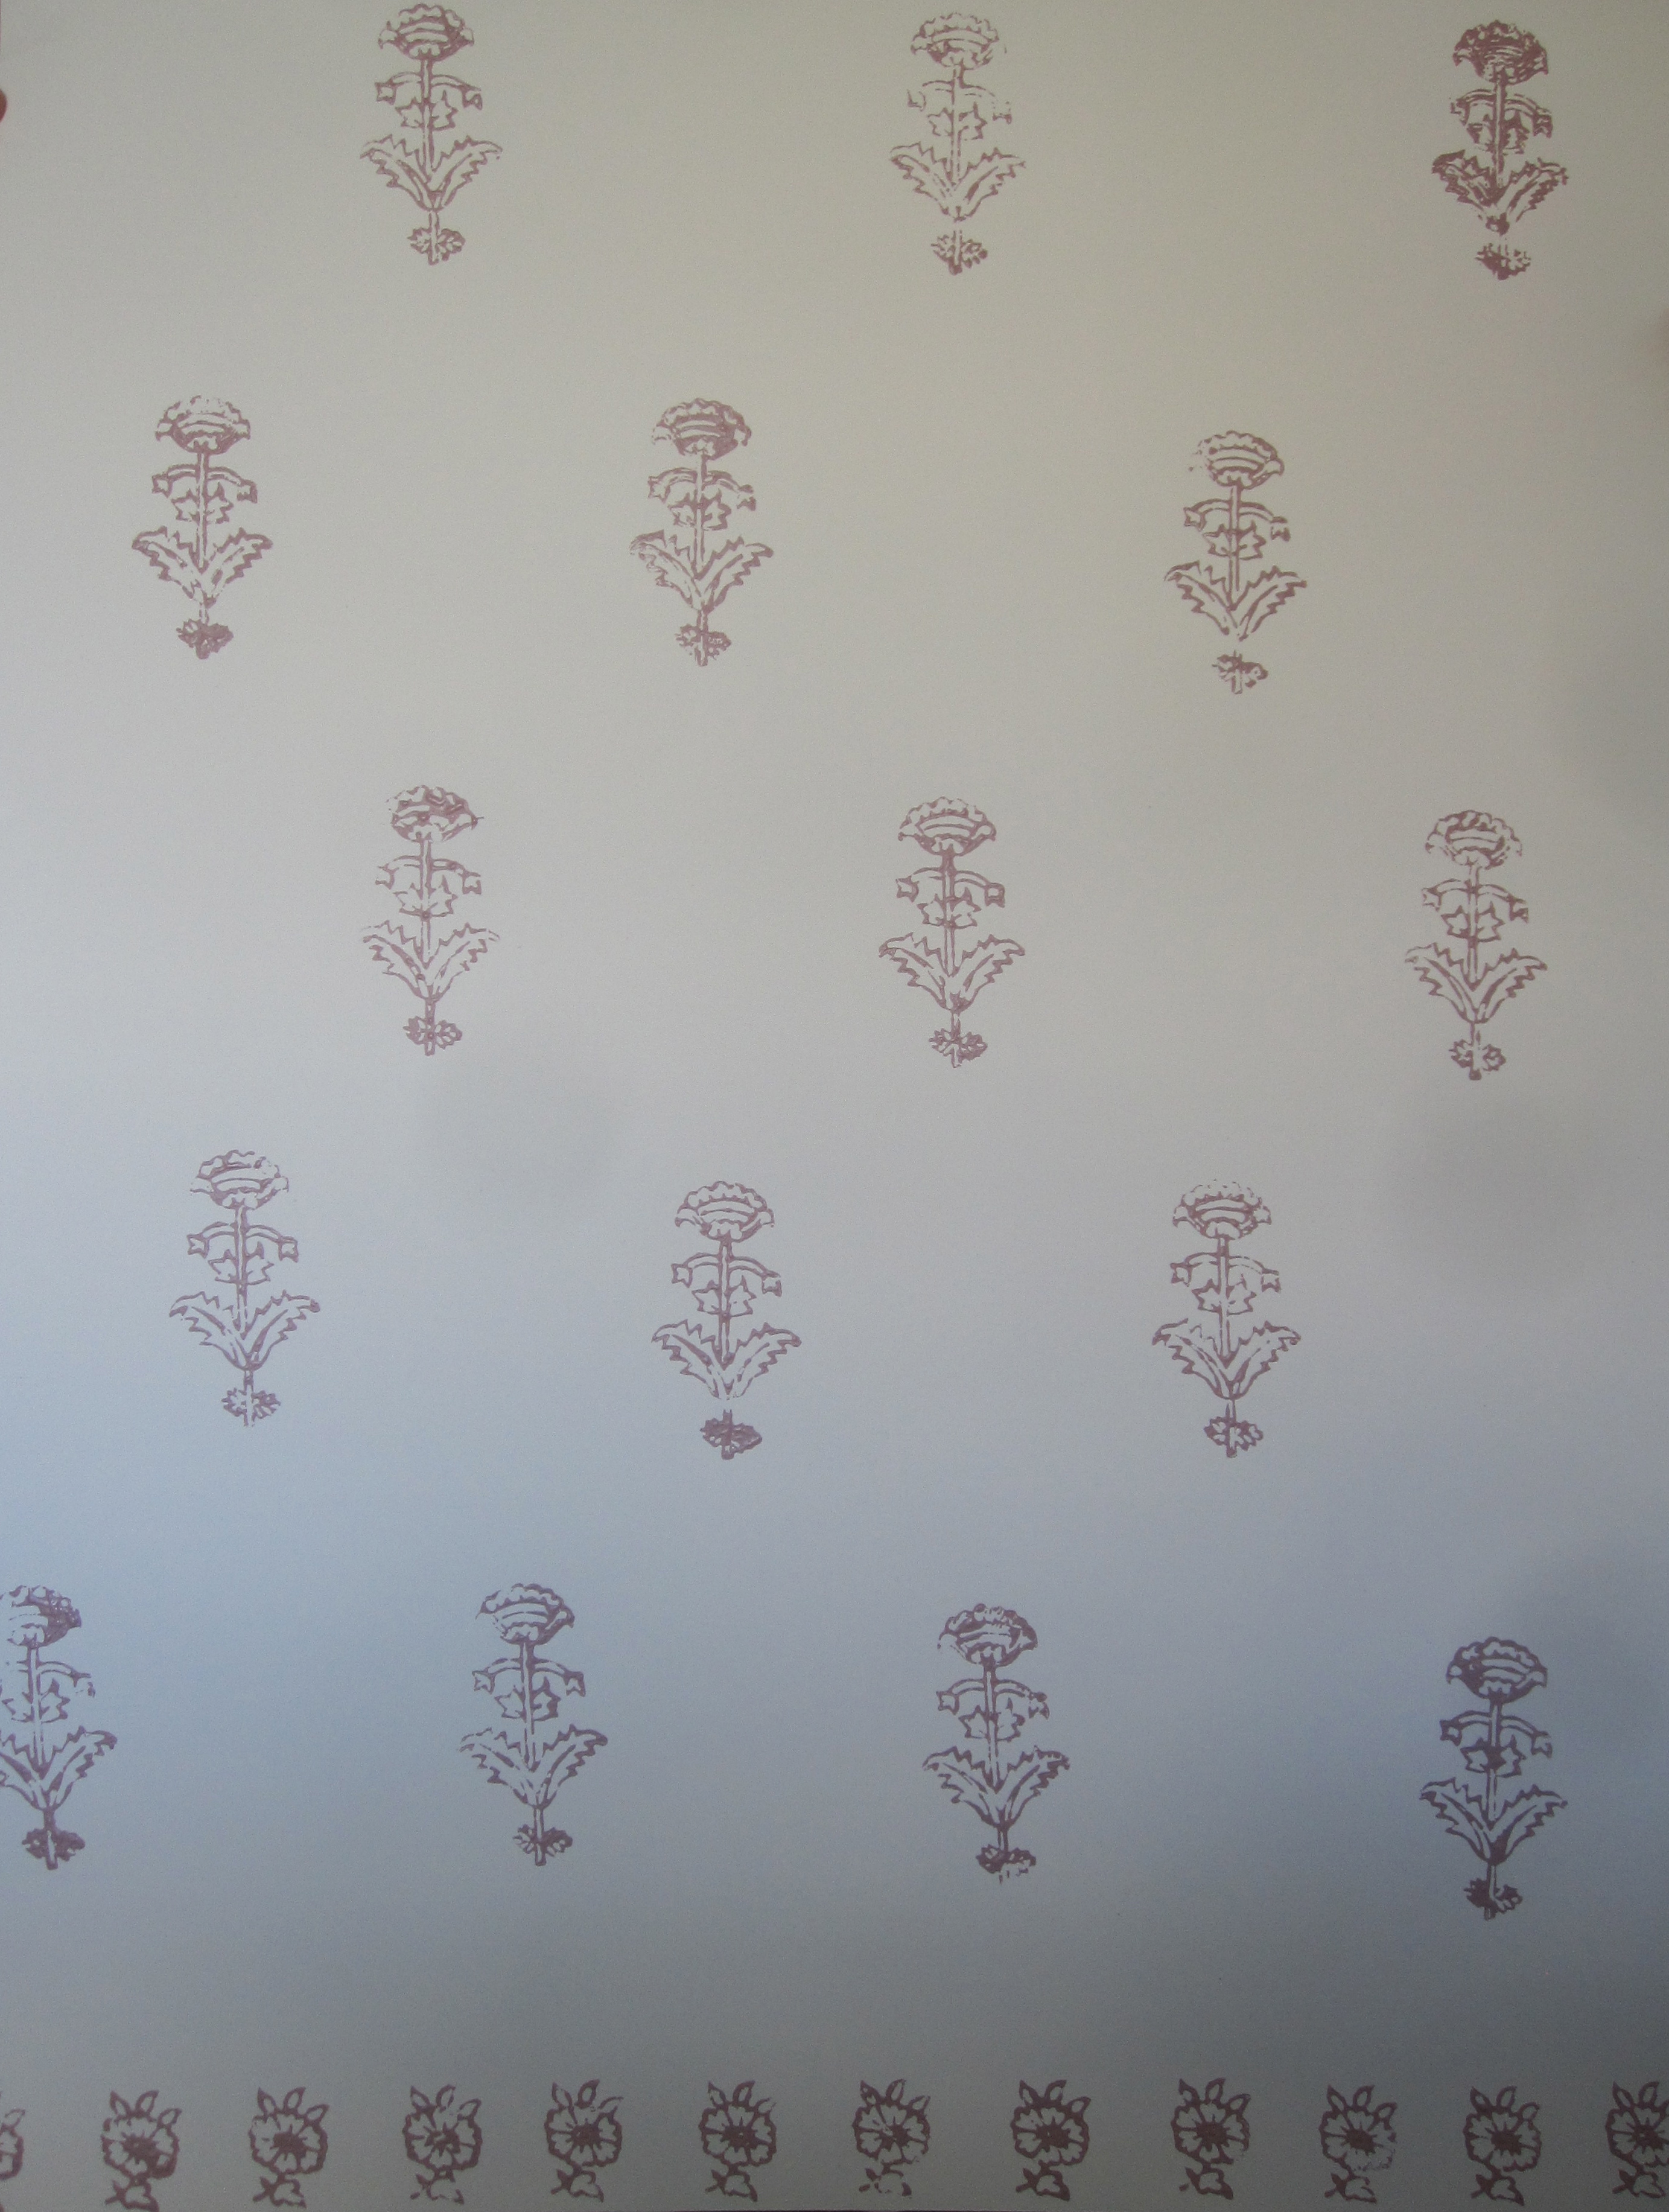
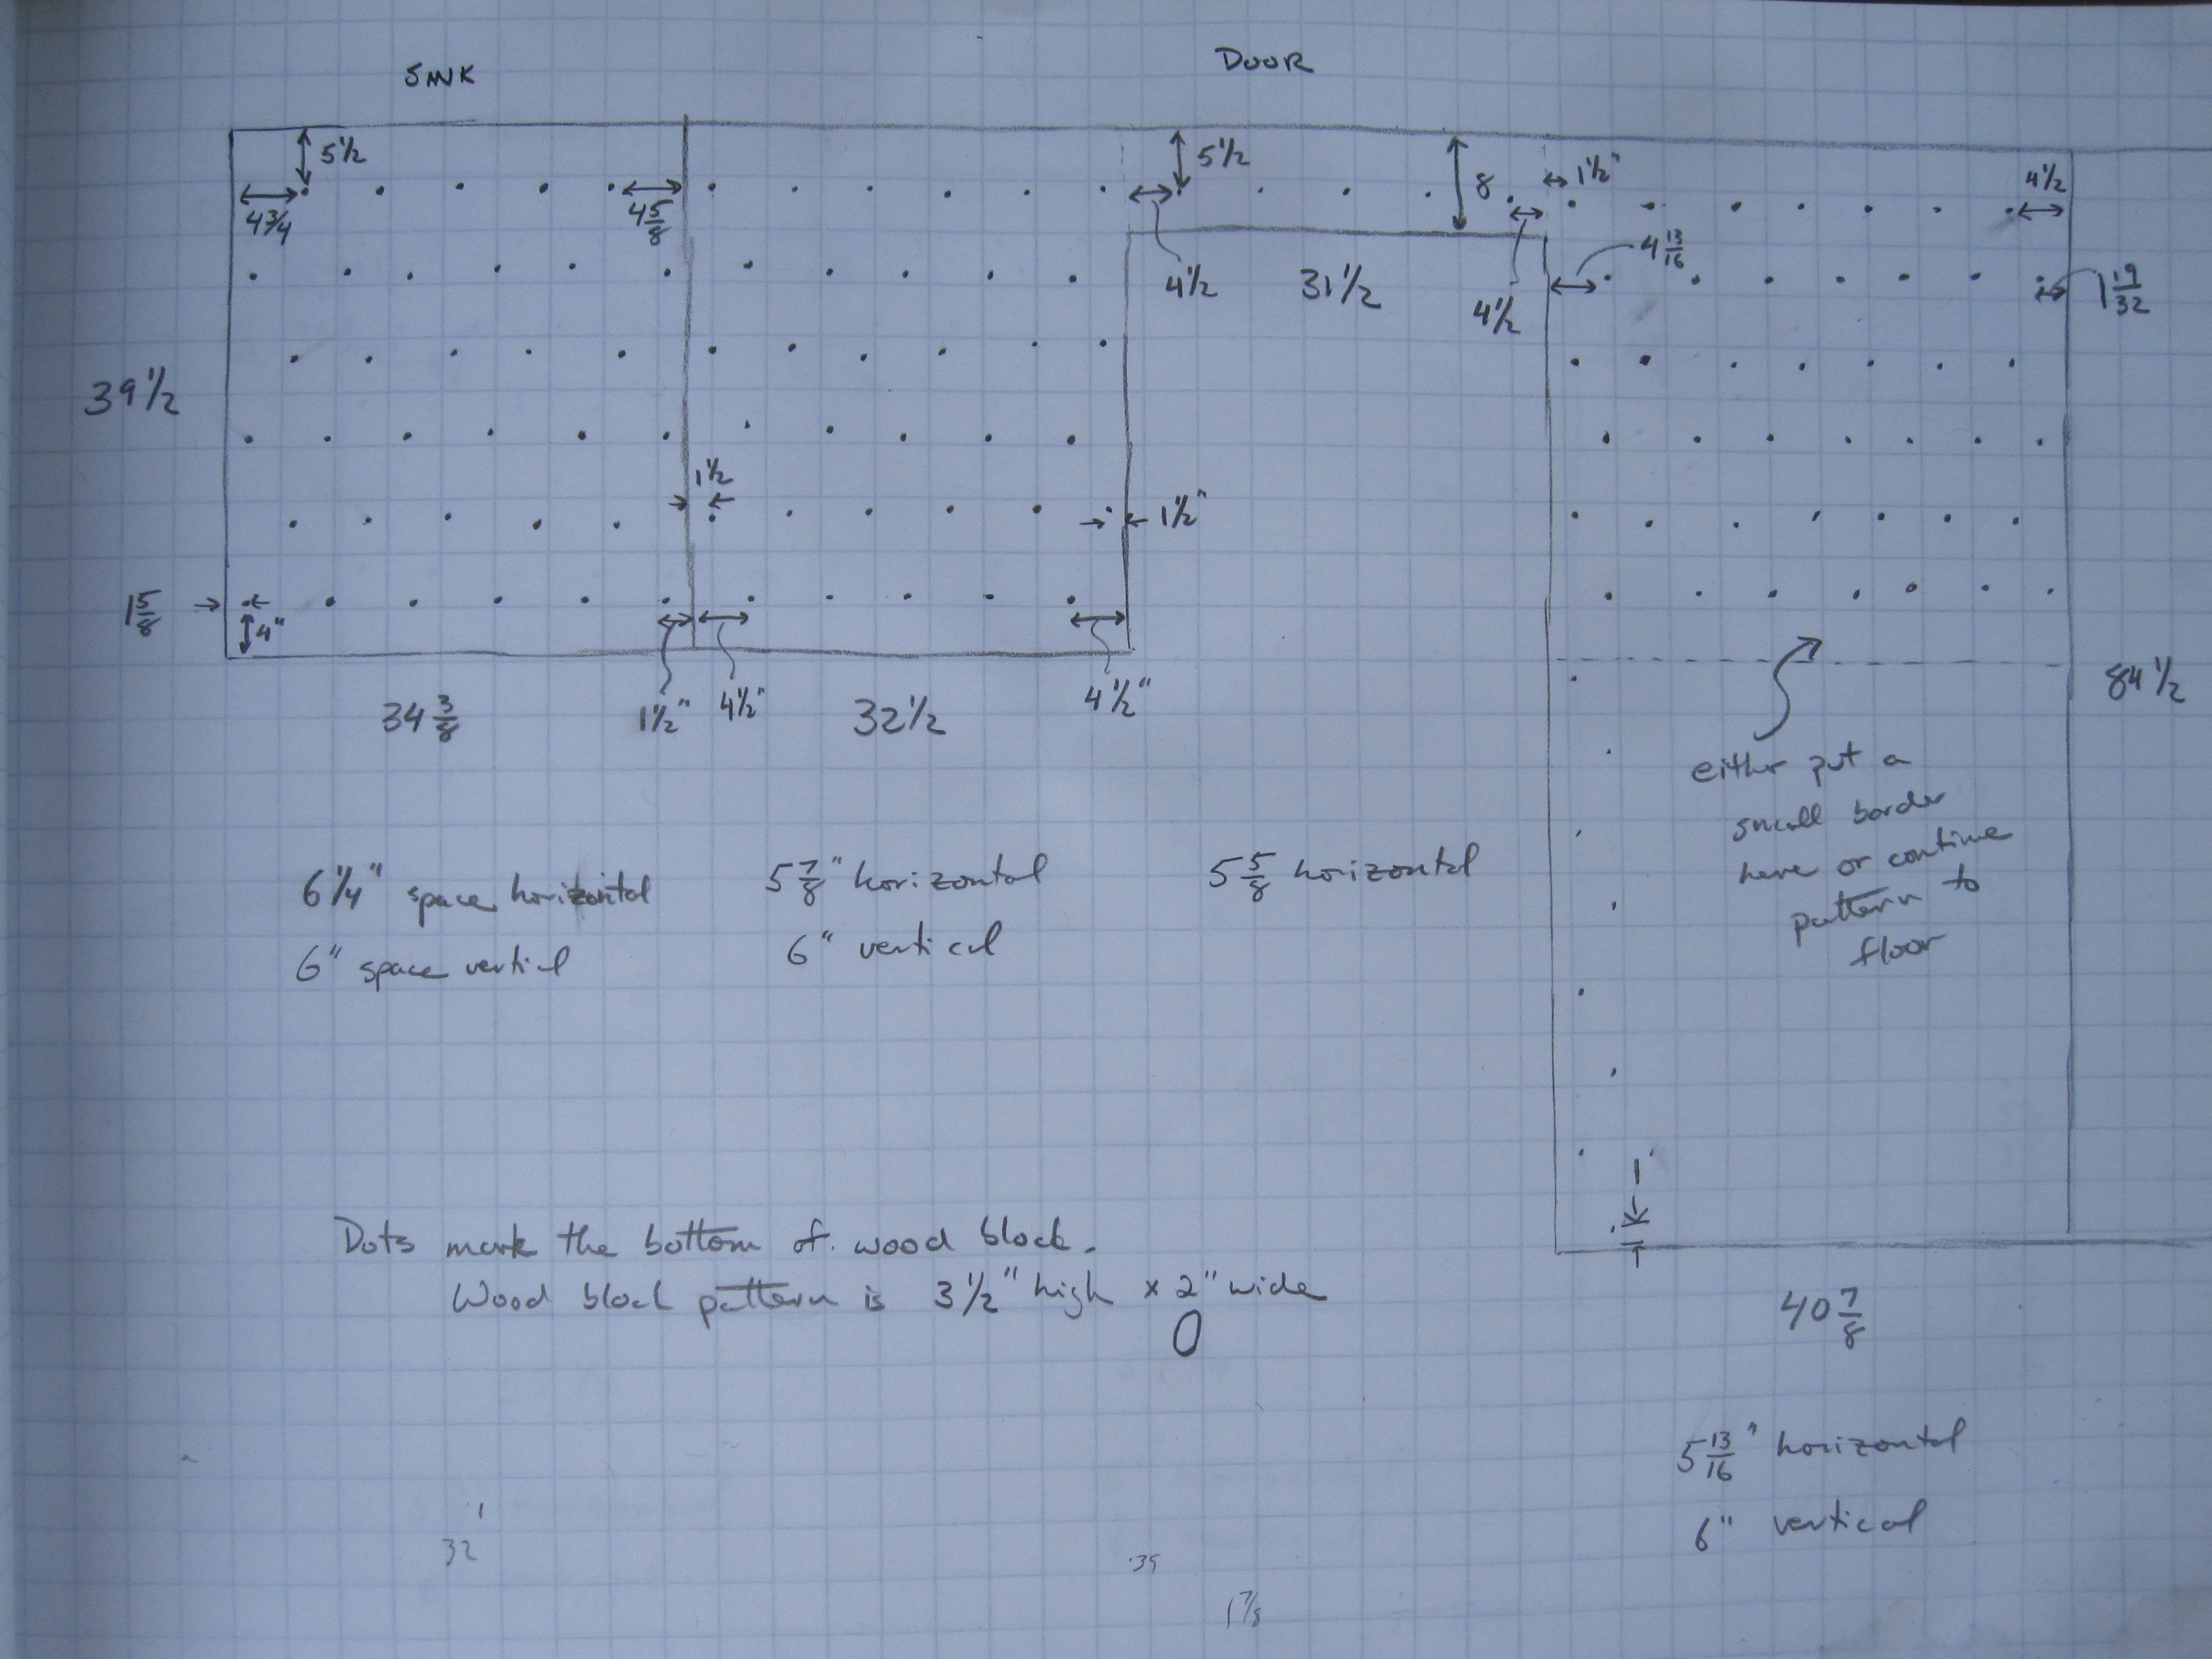
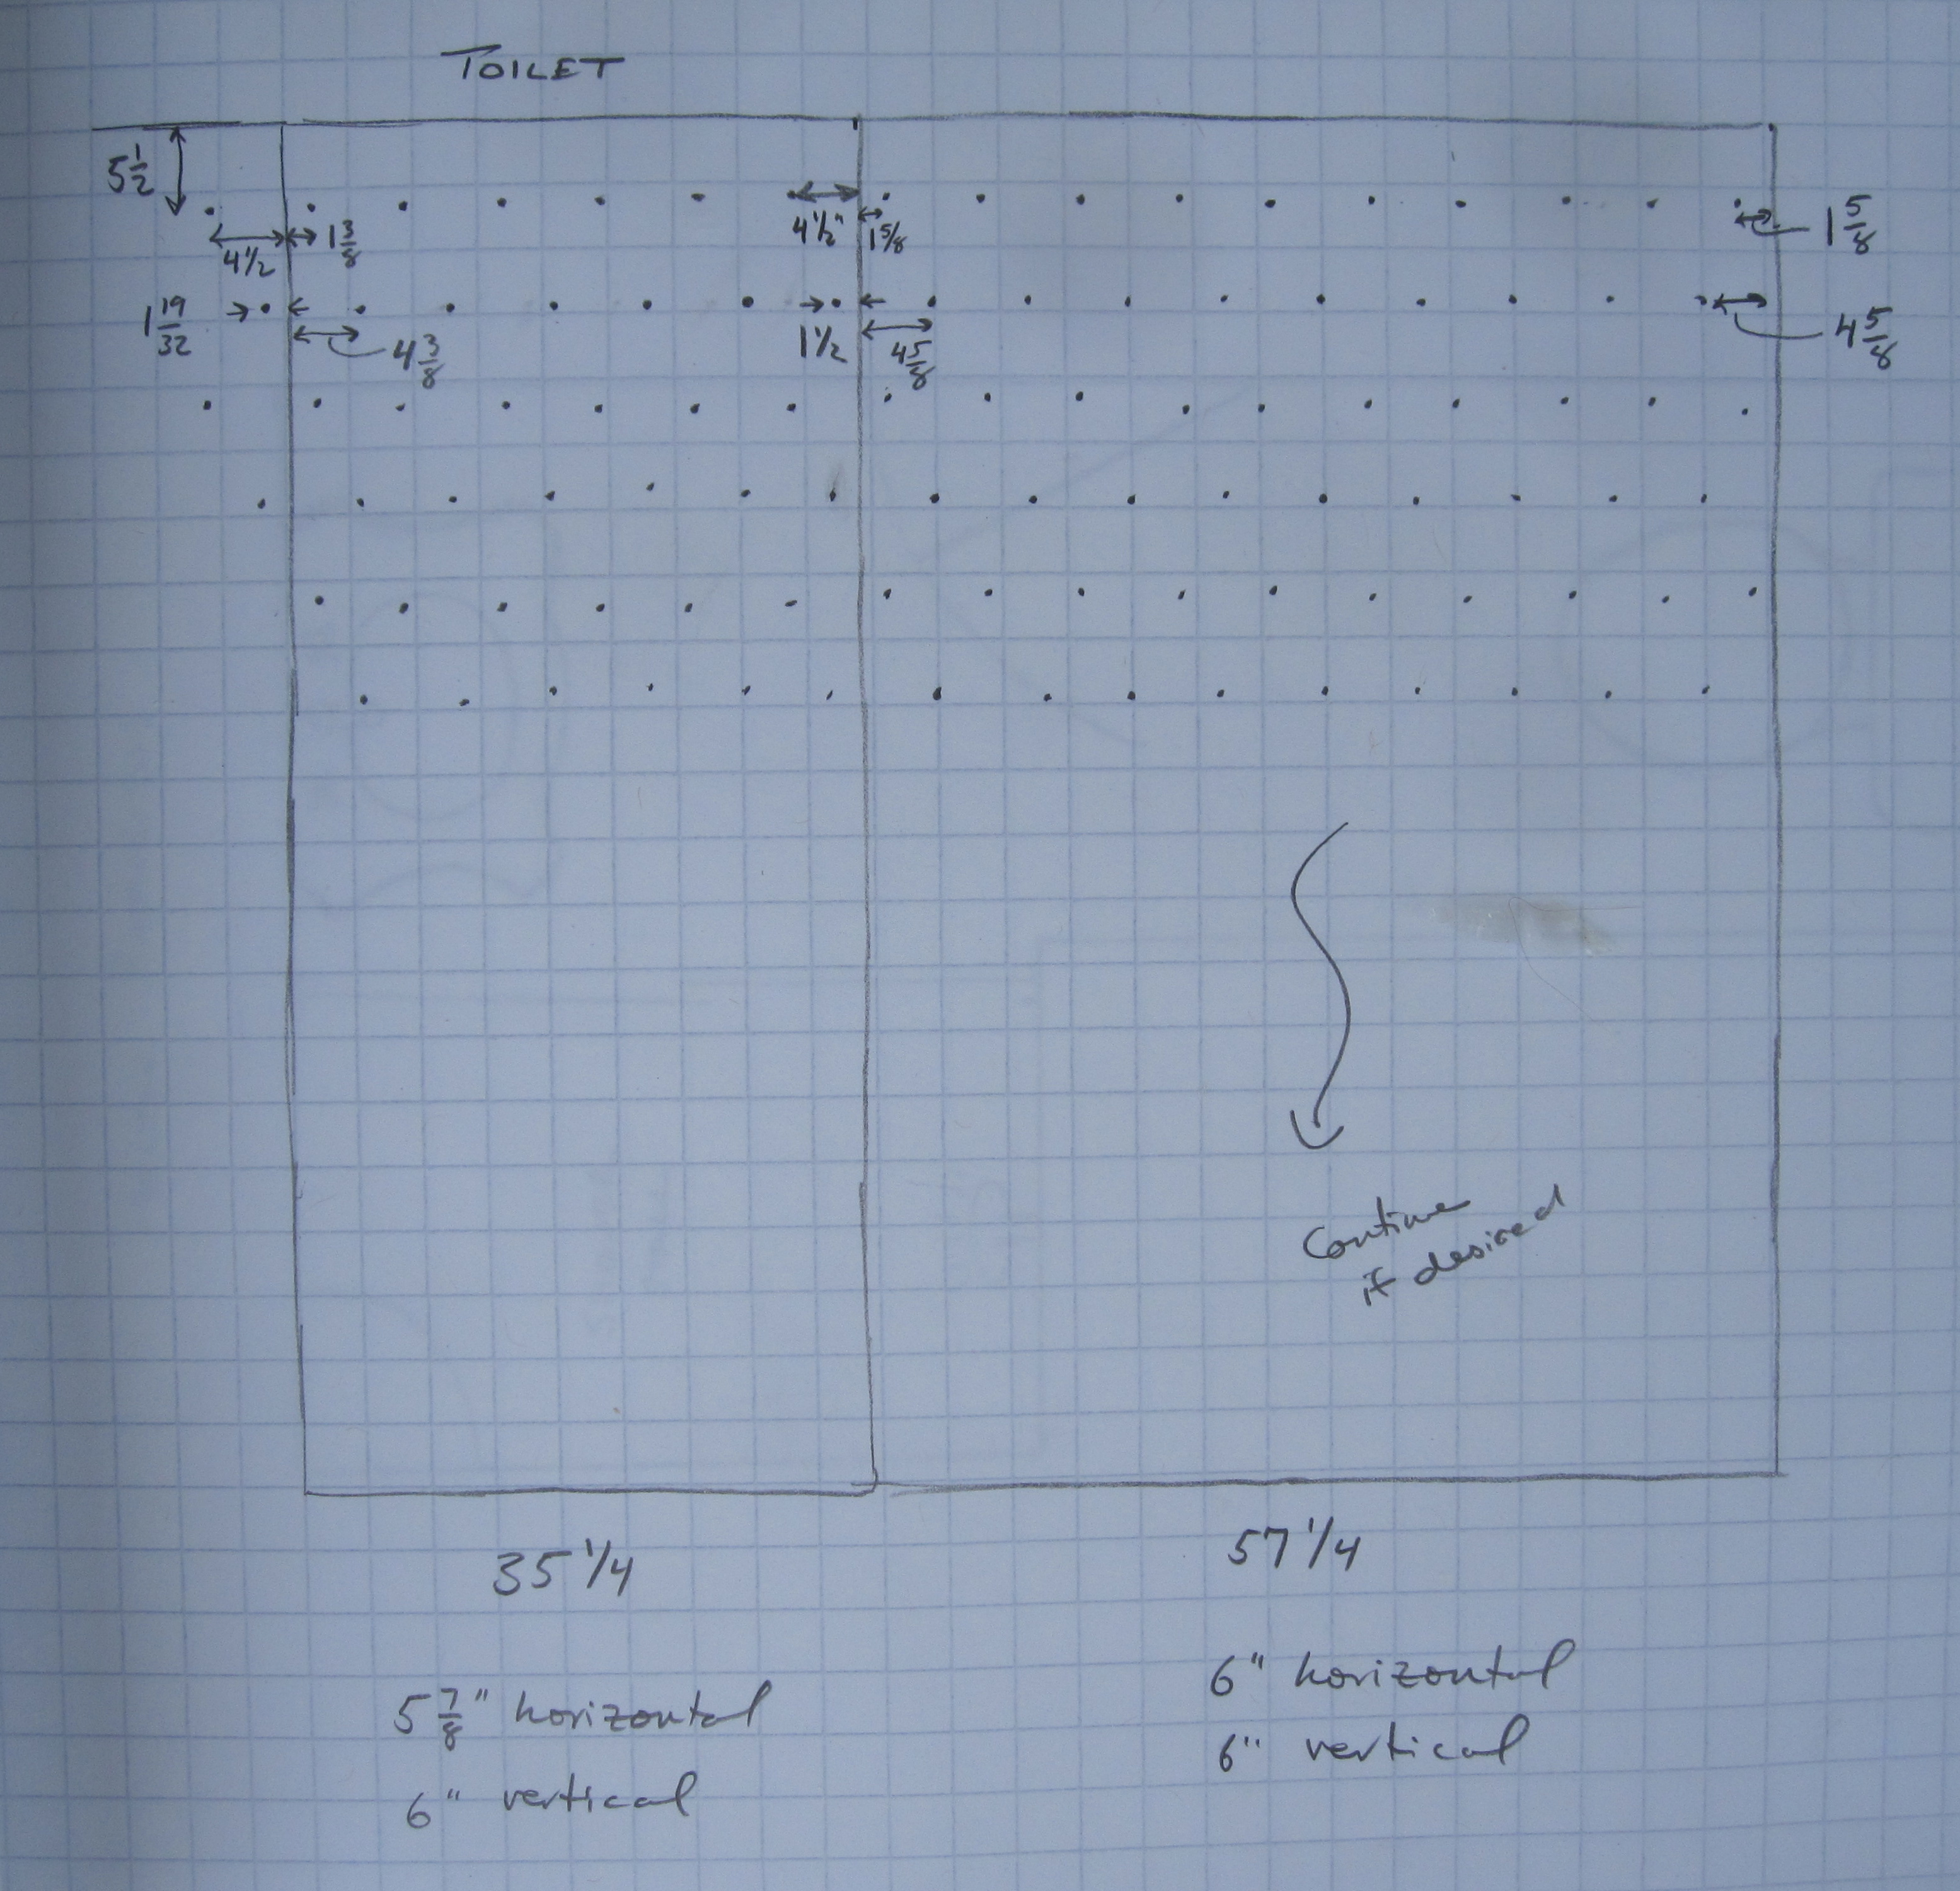
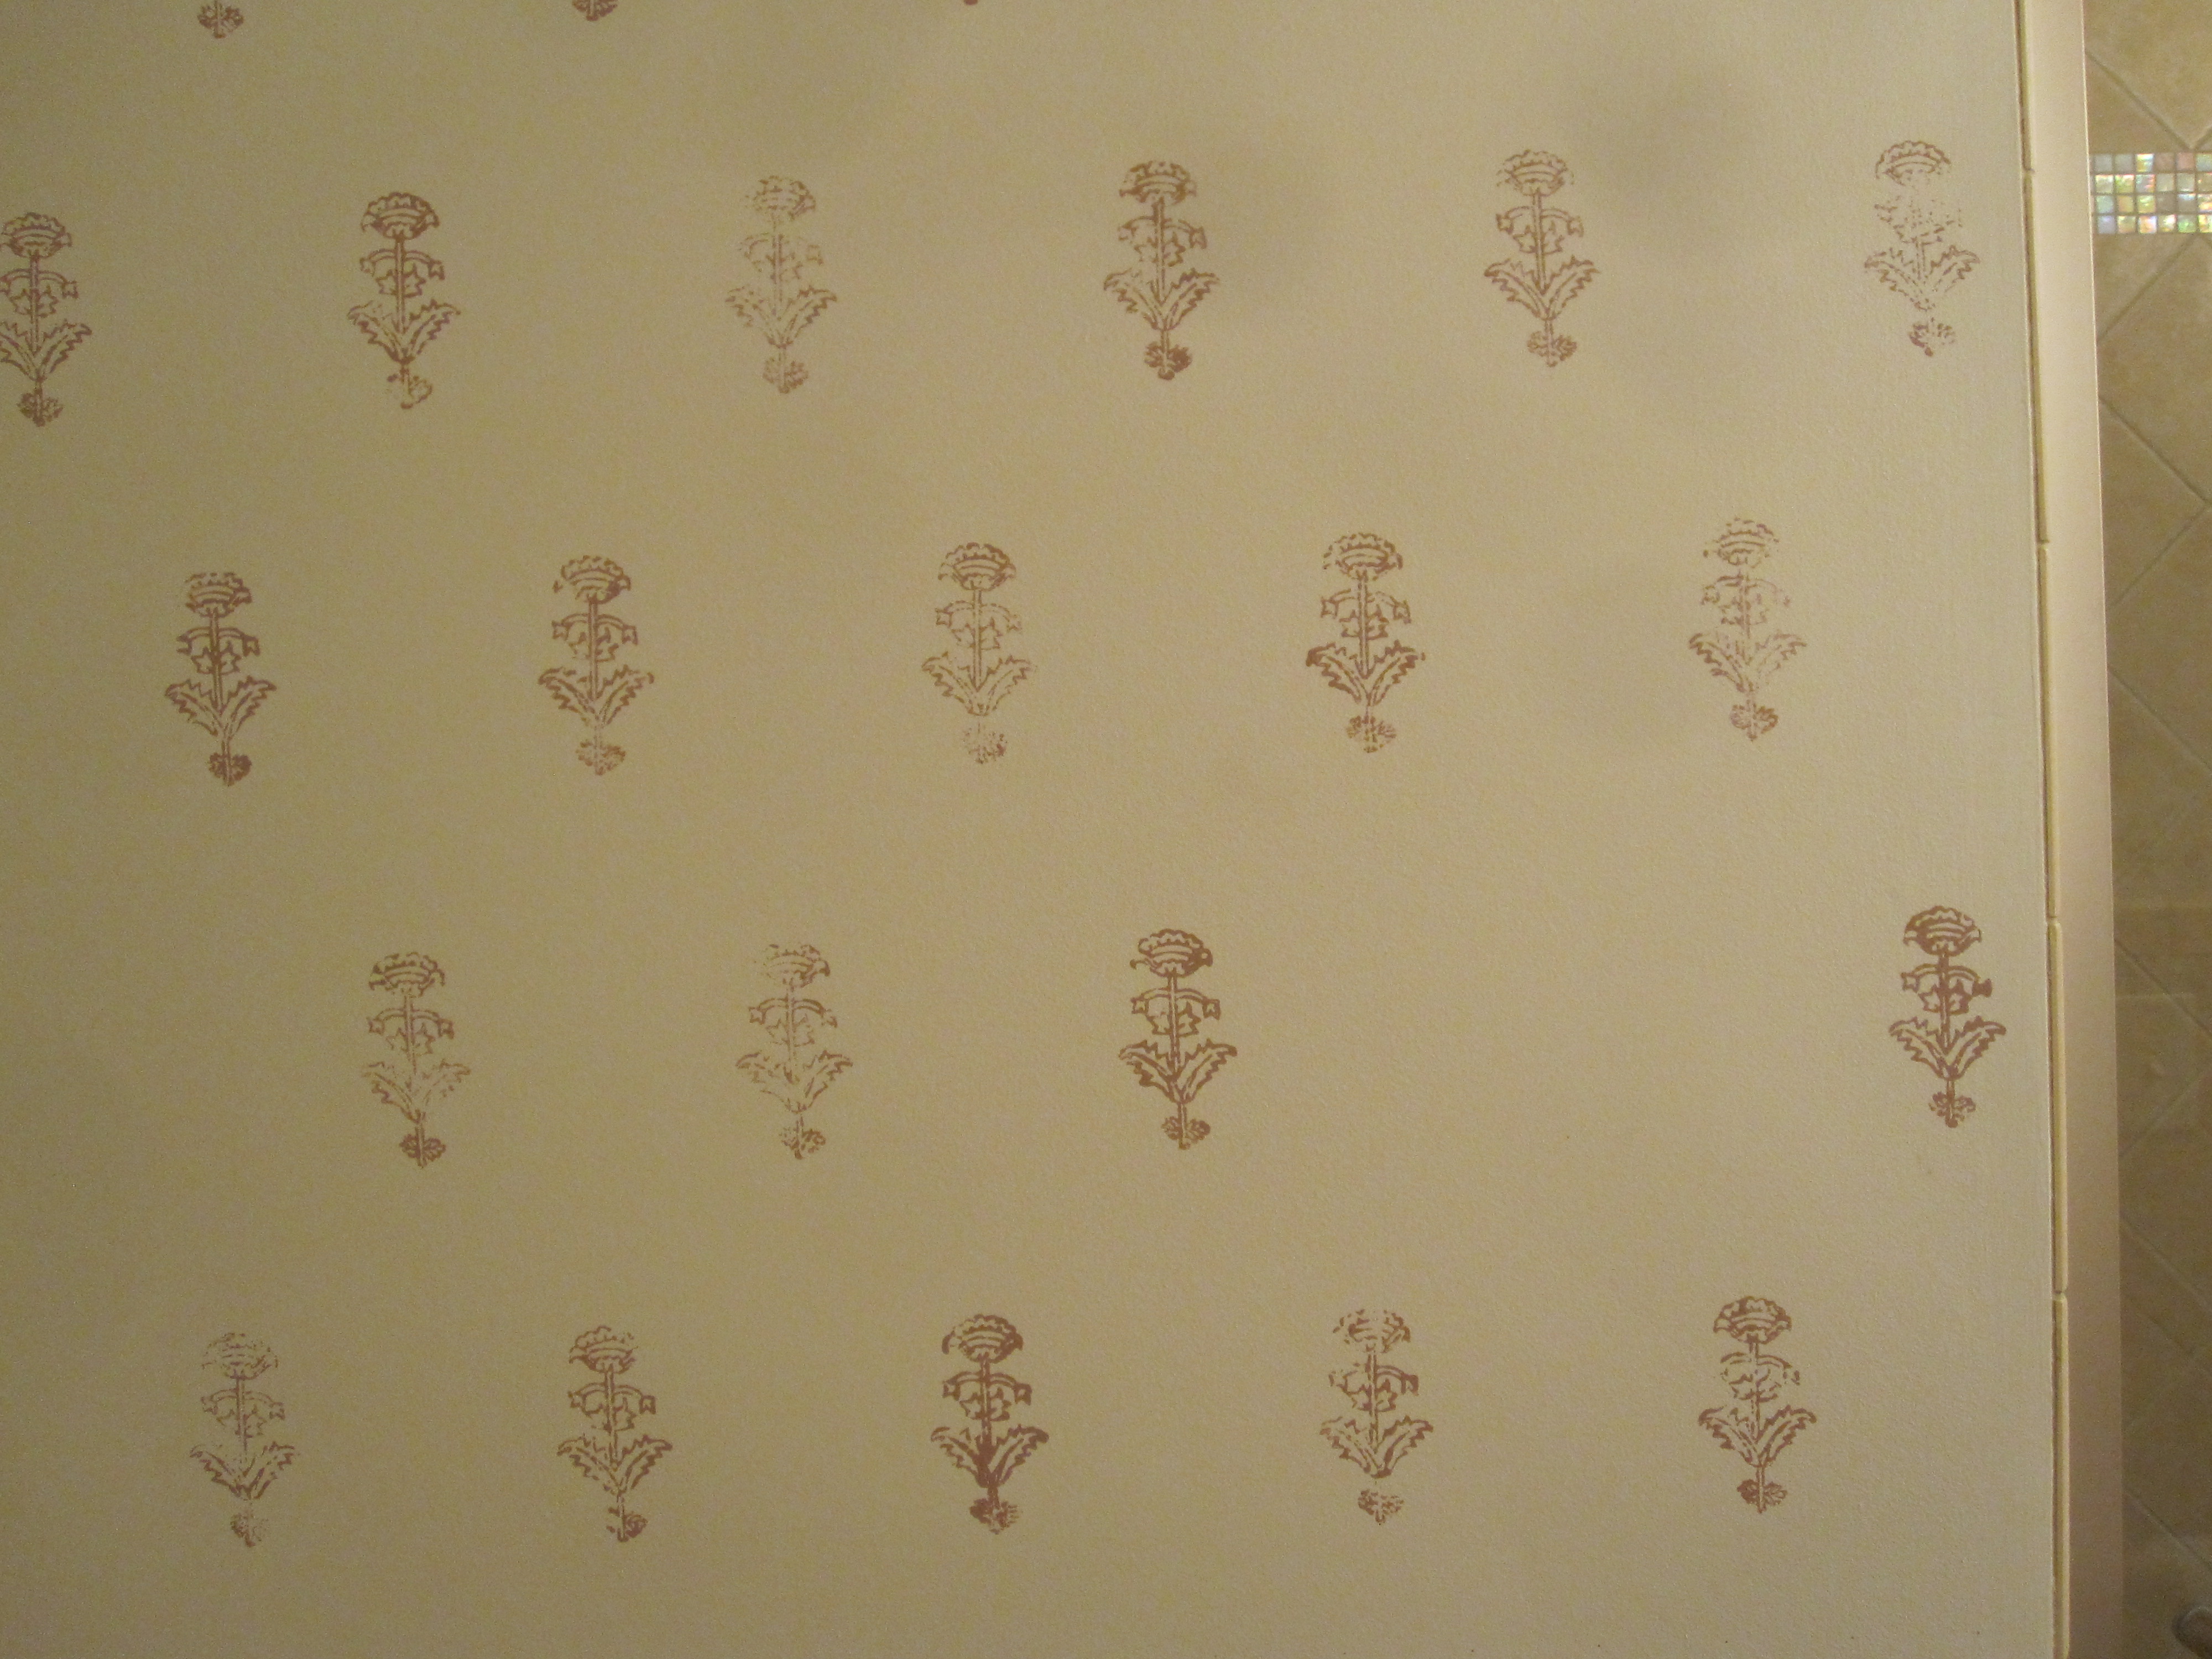
Aha! Now this was starting to look right. And I liked the idea of a band of the small flowers above the tile and bisecting the wall behind the toilet. We even considered a square border of the little flowers all around on each wall – a fillet à la the Dowager Duchess of Devonshire – but discarded it as the room is just too tiny. I did this just casually eyeballing it, so luckily my sweet and very mathematically smart husband decided to help by figuring out the exact spacing and placement for the walls.
Hours of work went into these documents and the success of the project really hinges on his work more than mine.
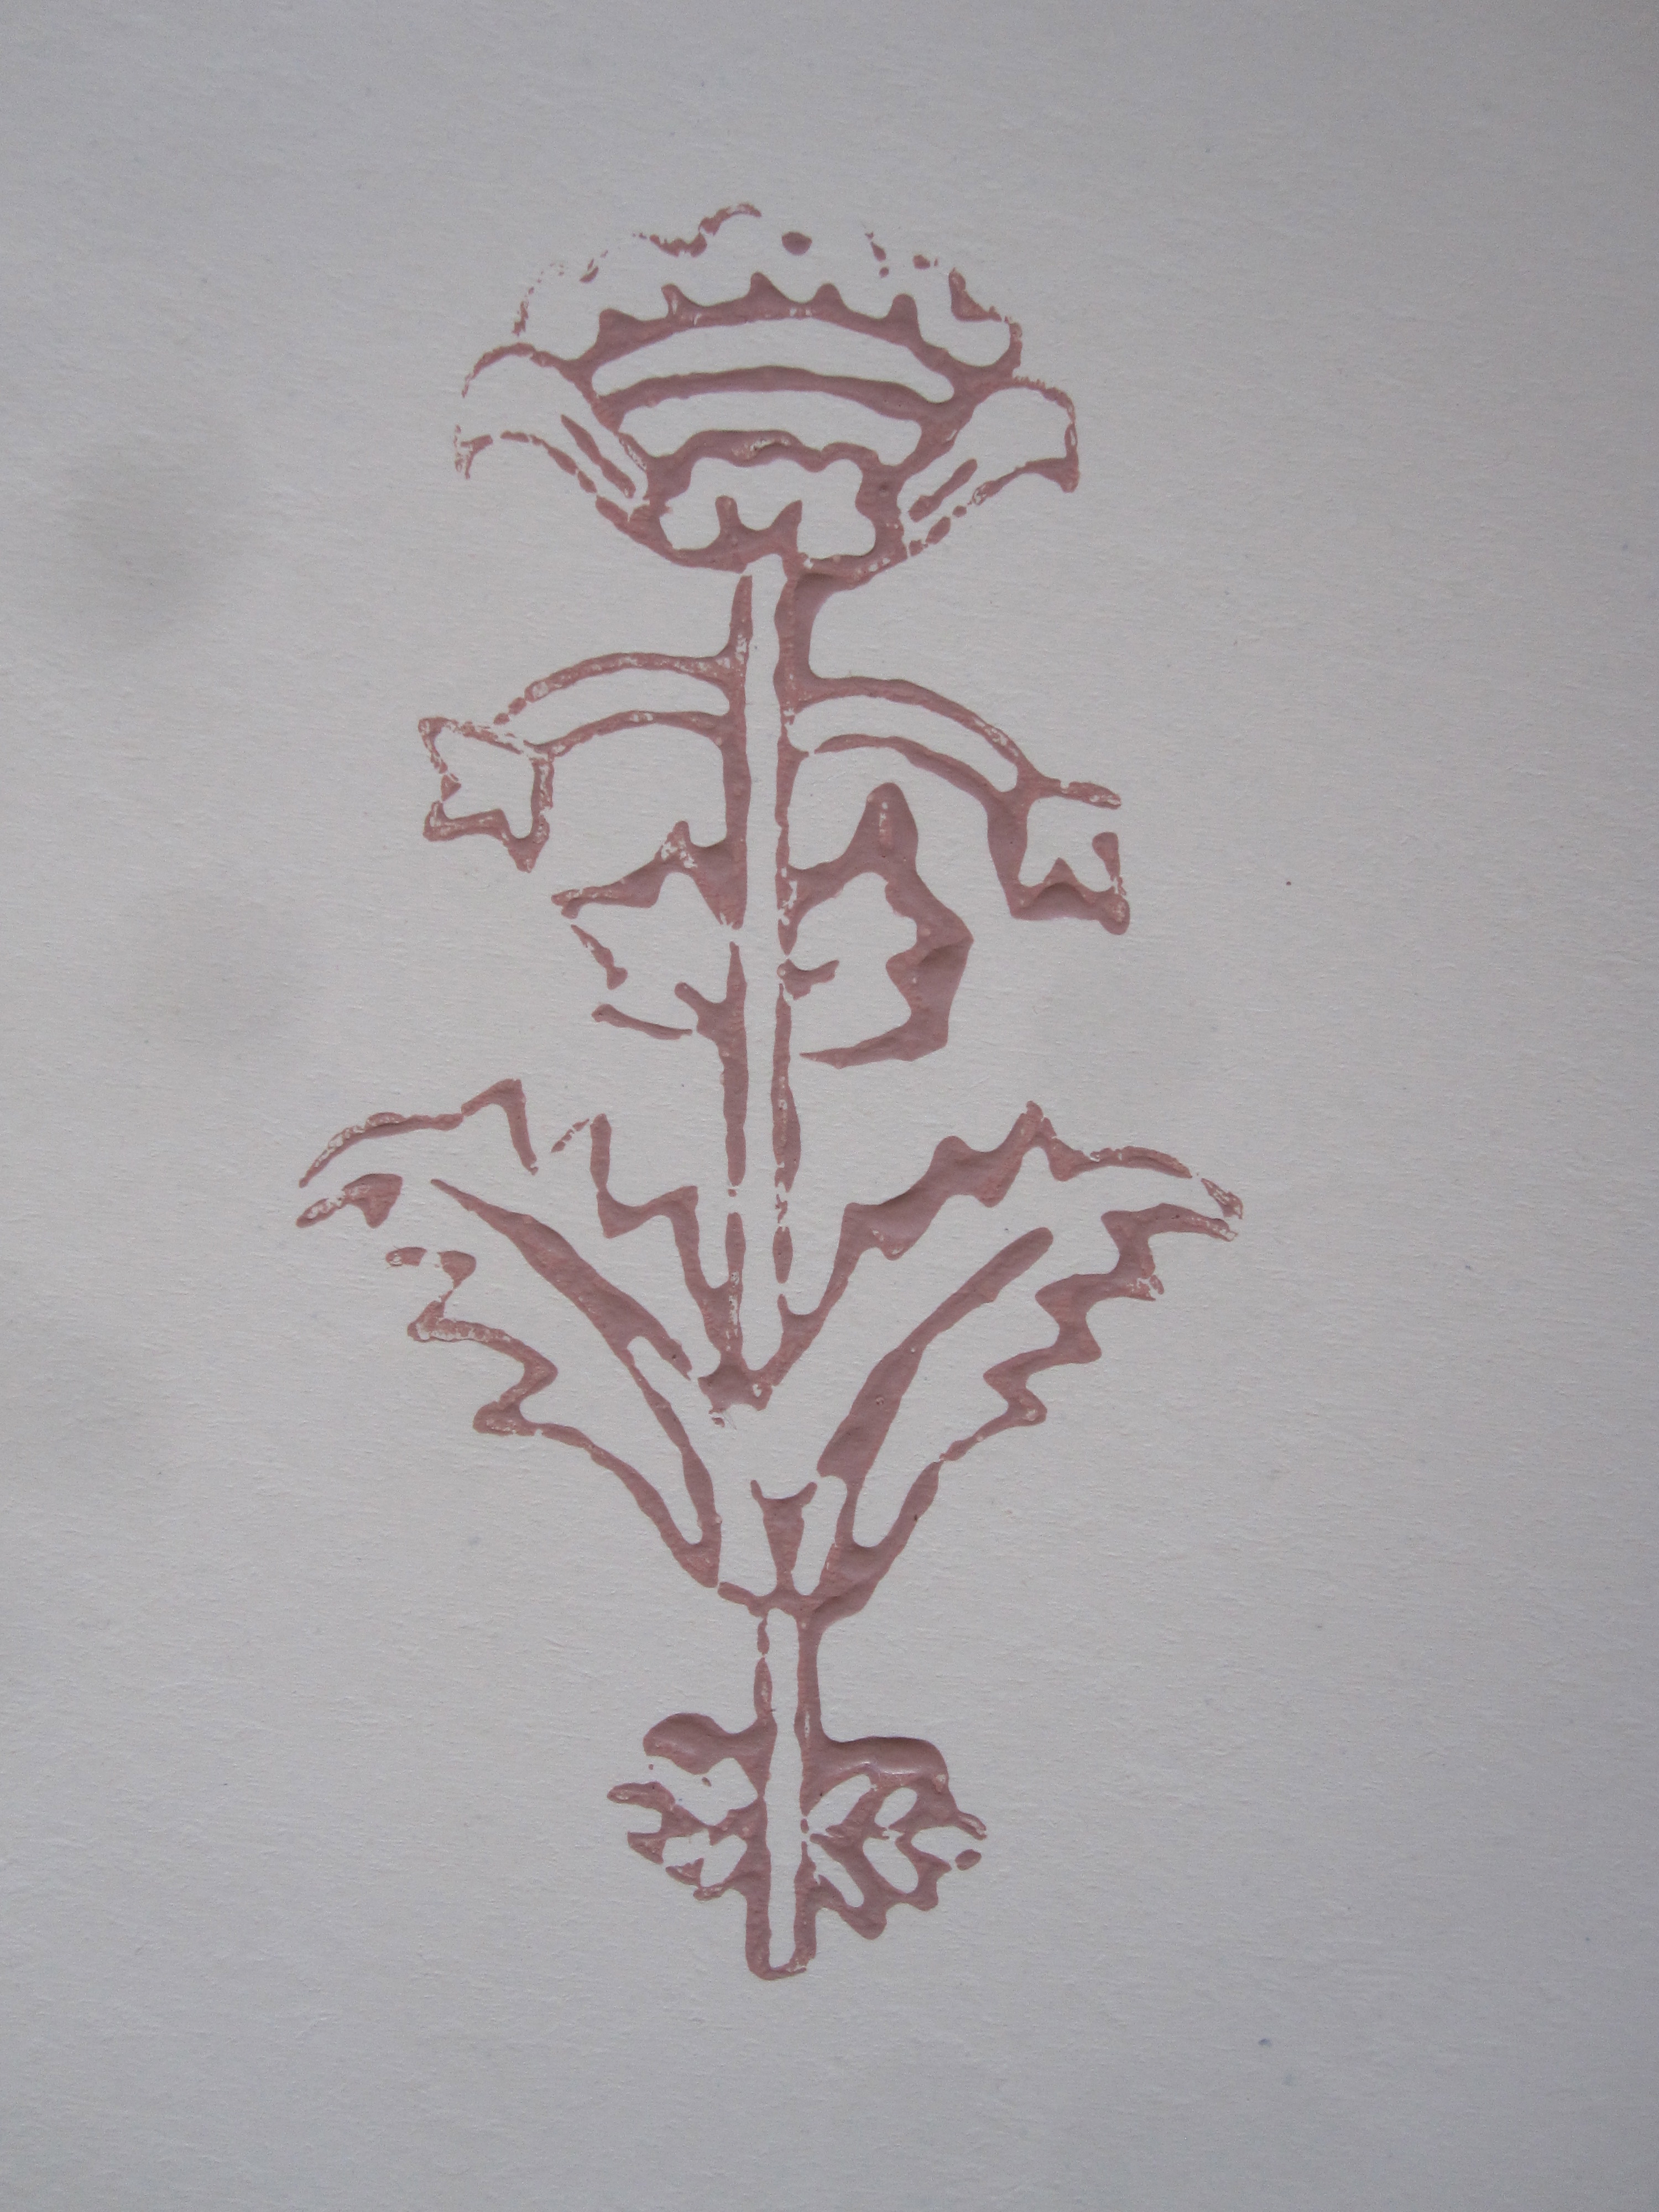
While the design had started to come together, the quality of the actual prints was not so good. Here’s a close-up of one of the practice flowers – you can see the paint is very thick and three-dimensional.
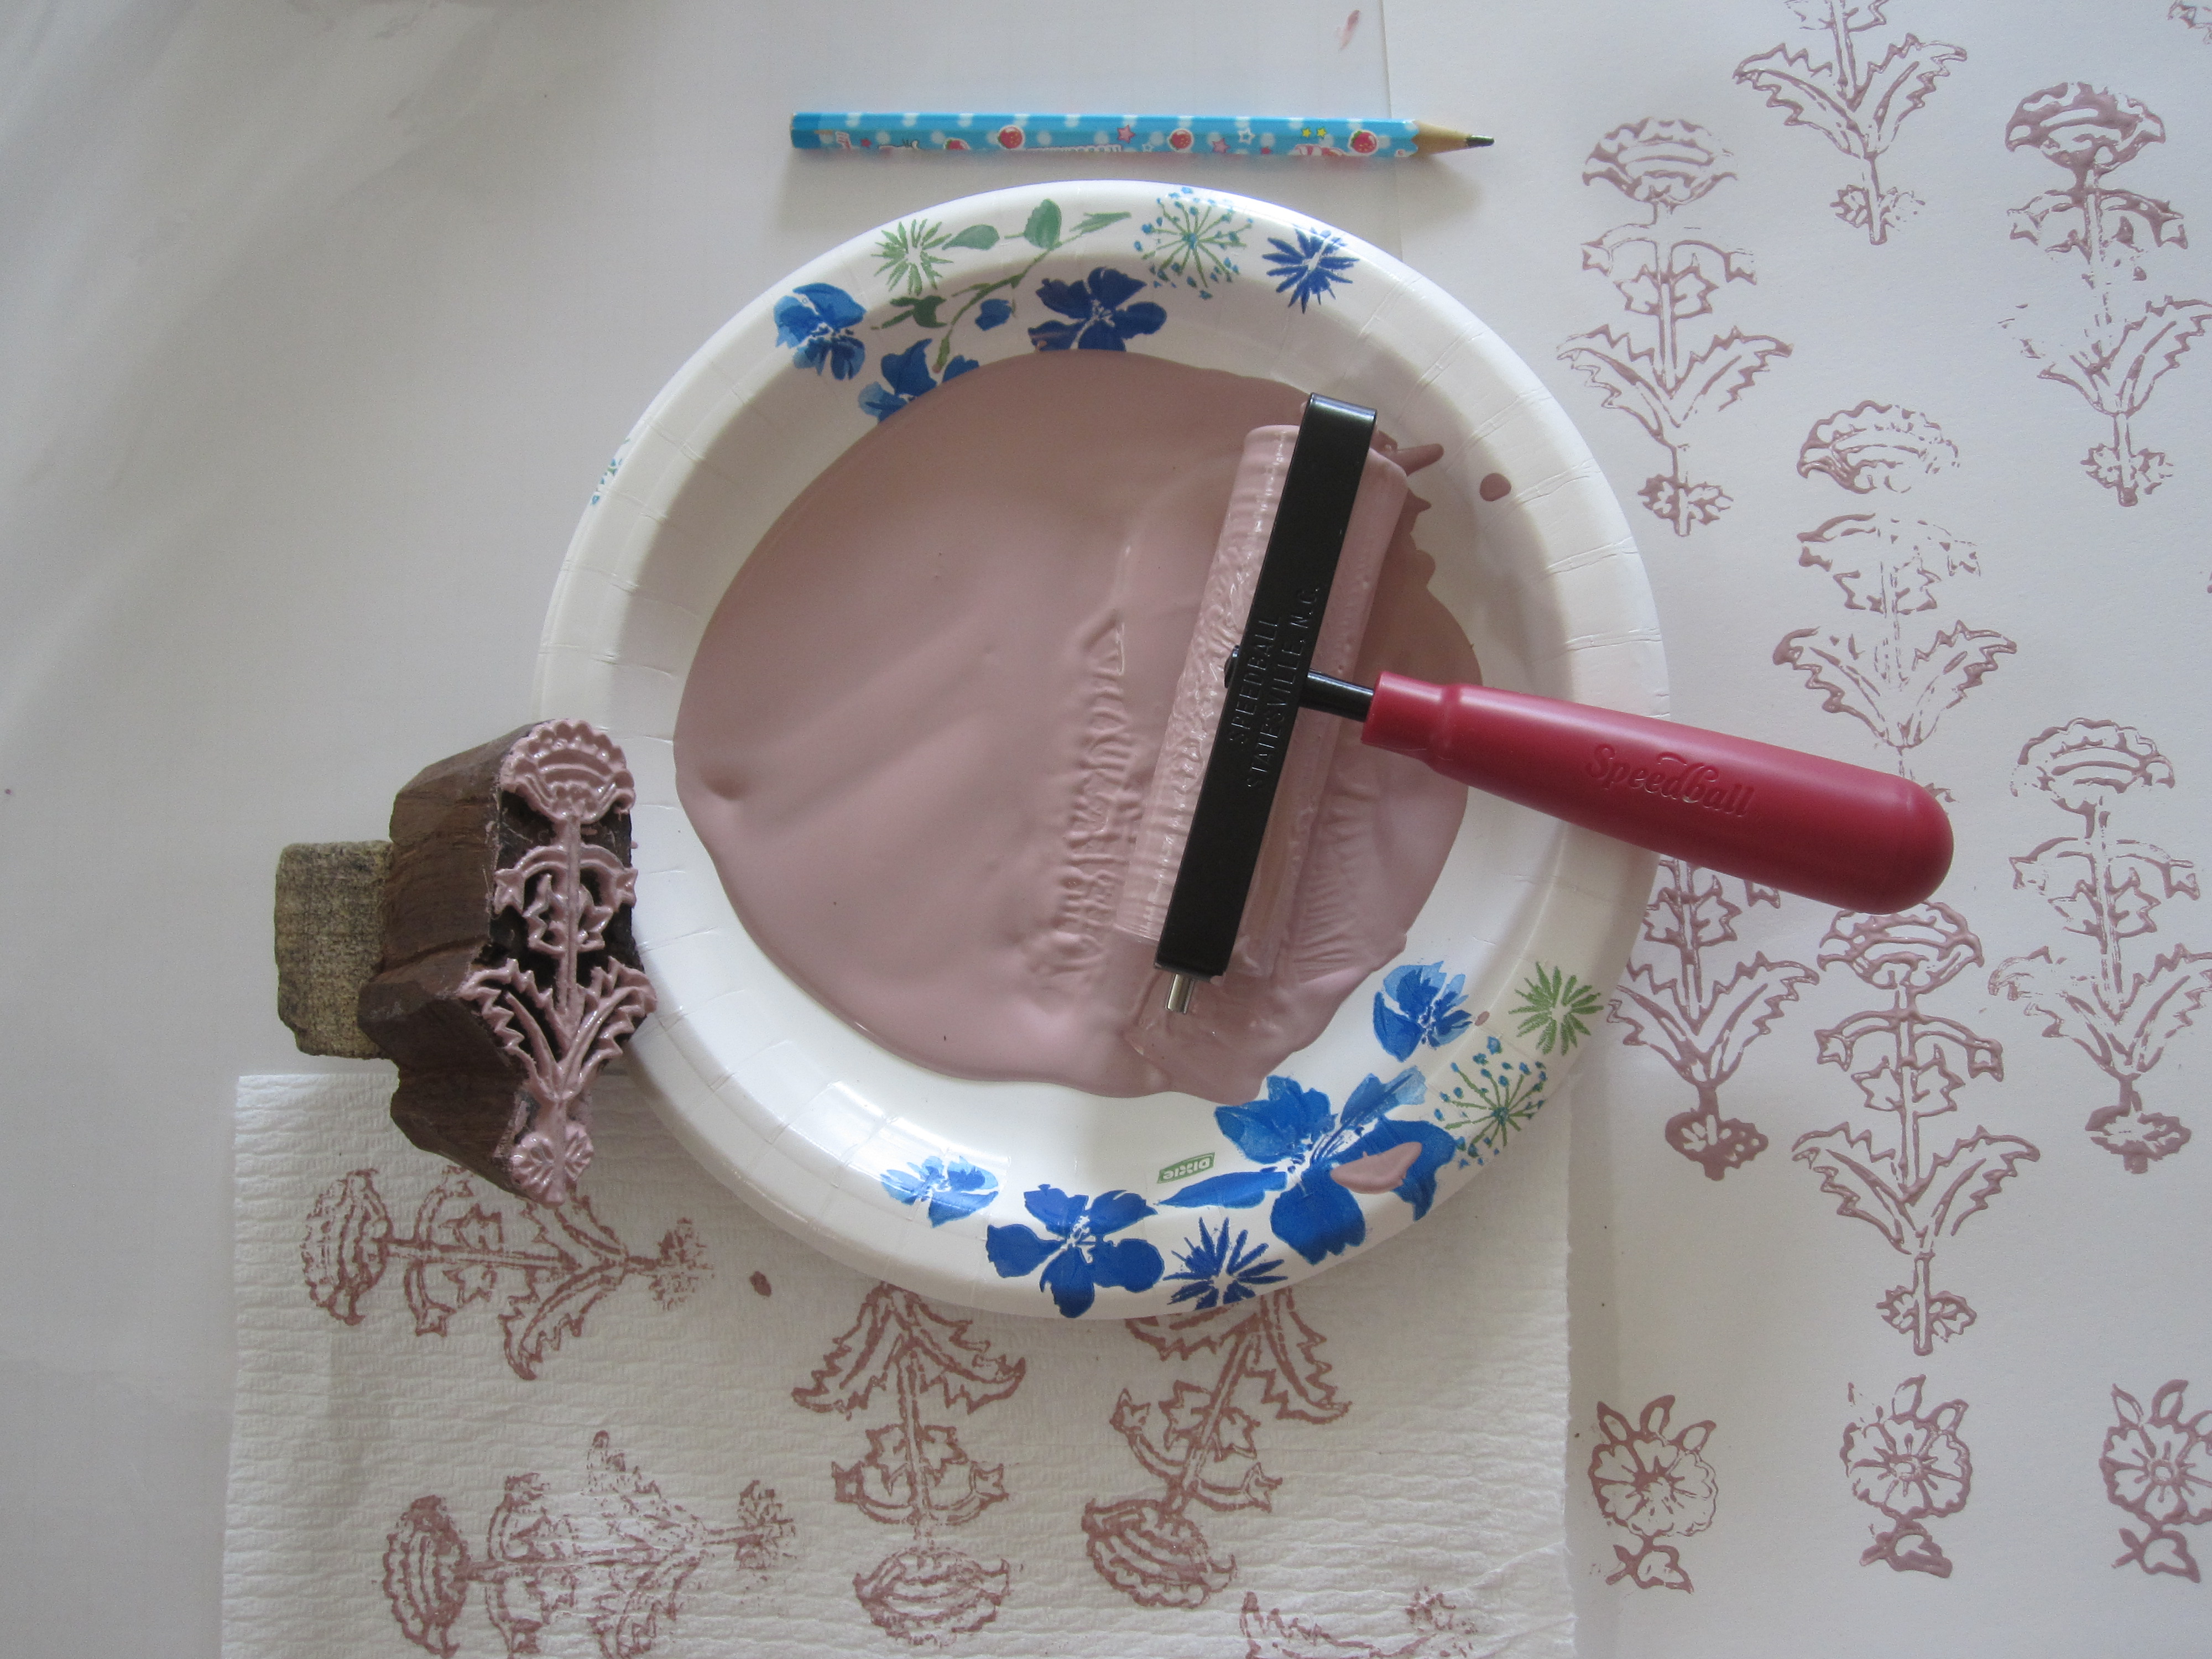
Then late that night it finally occurred to me to actually research how this should be done and lo and behold, I discovered I was missing one essential piece, a small rubber roller called a brayer. So day two and off to the craft store we went! The brayer solves the gunky paint issue by controlling how much goes on and keeping it on the design part of the block only and out of the deep recesses. You can see from the practice below how much better the printing looks.
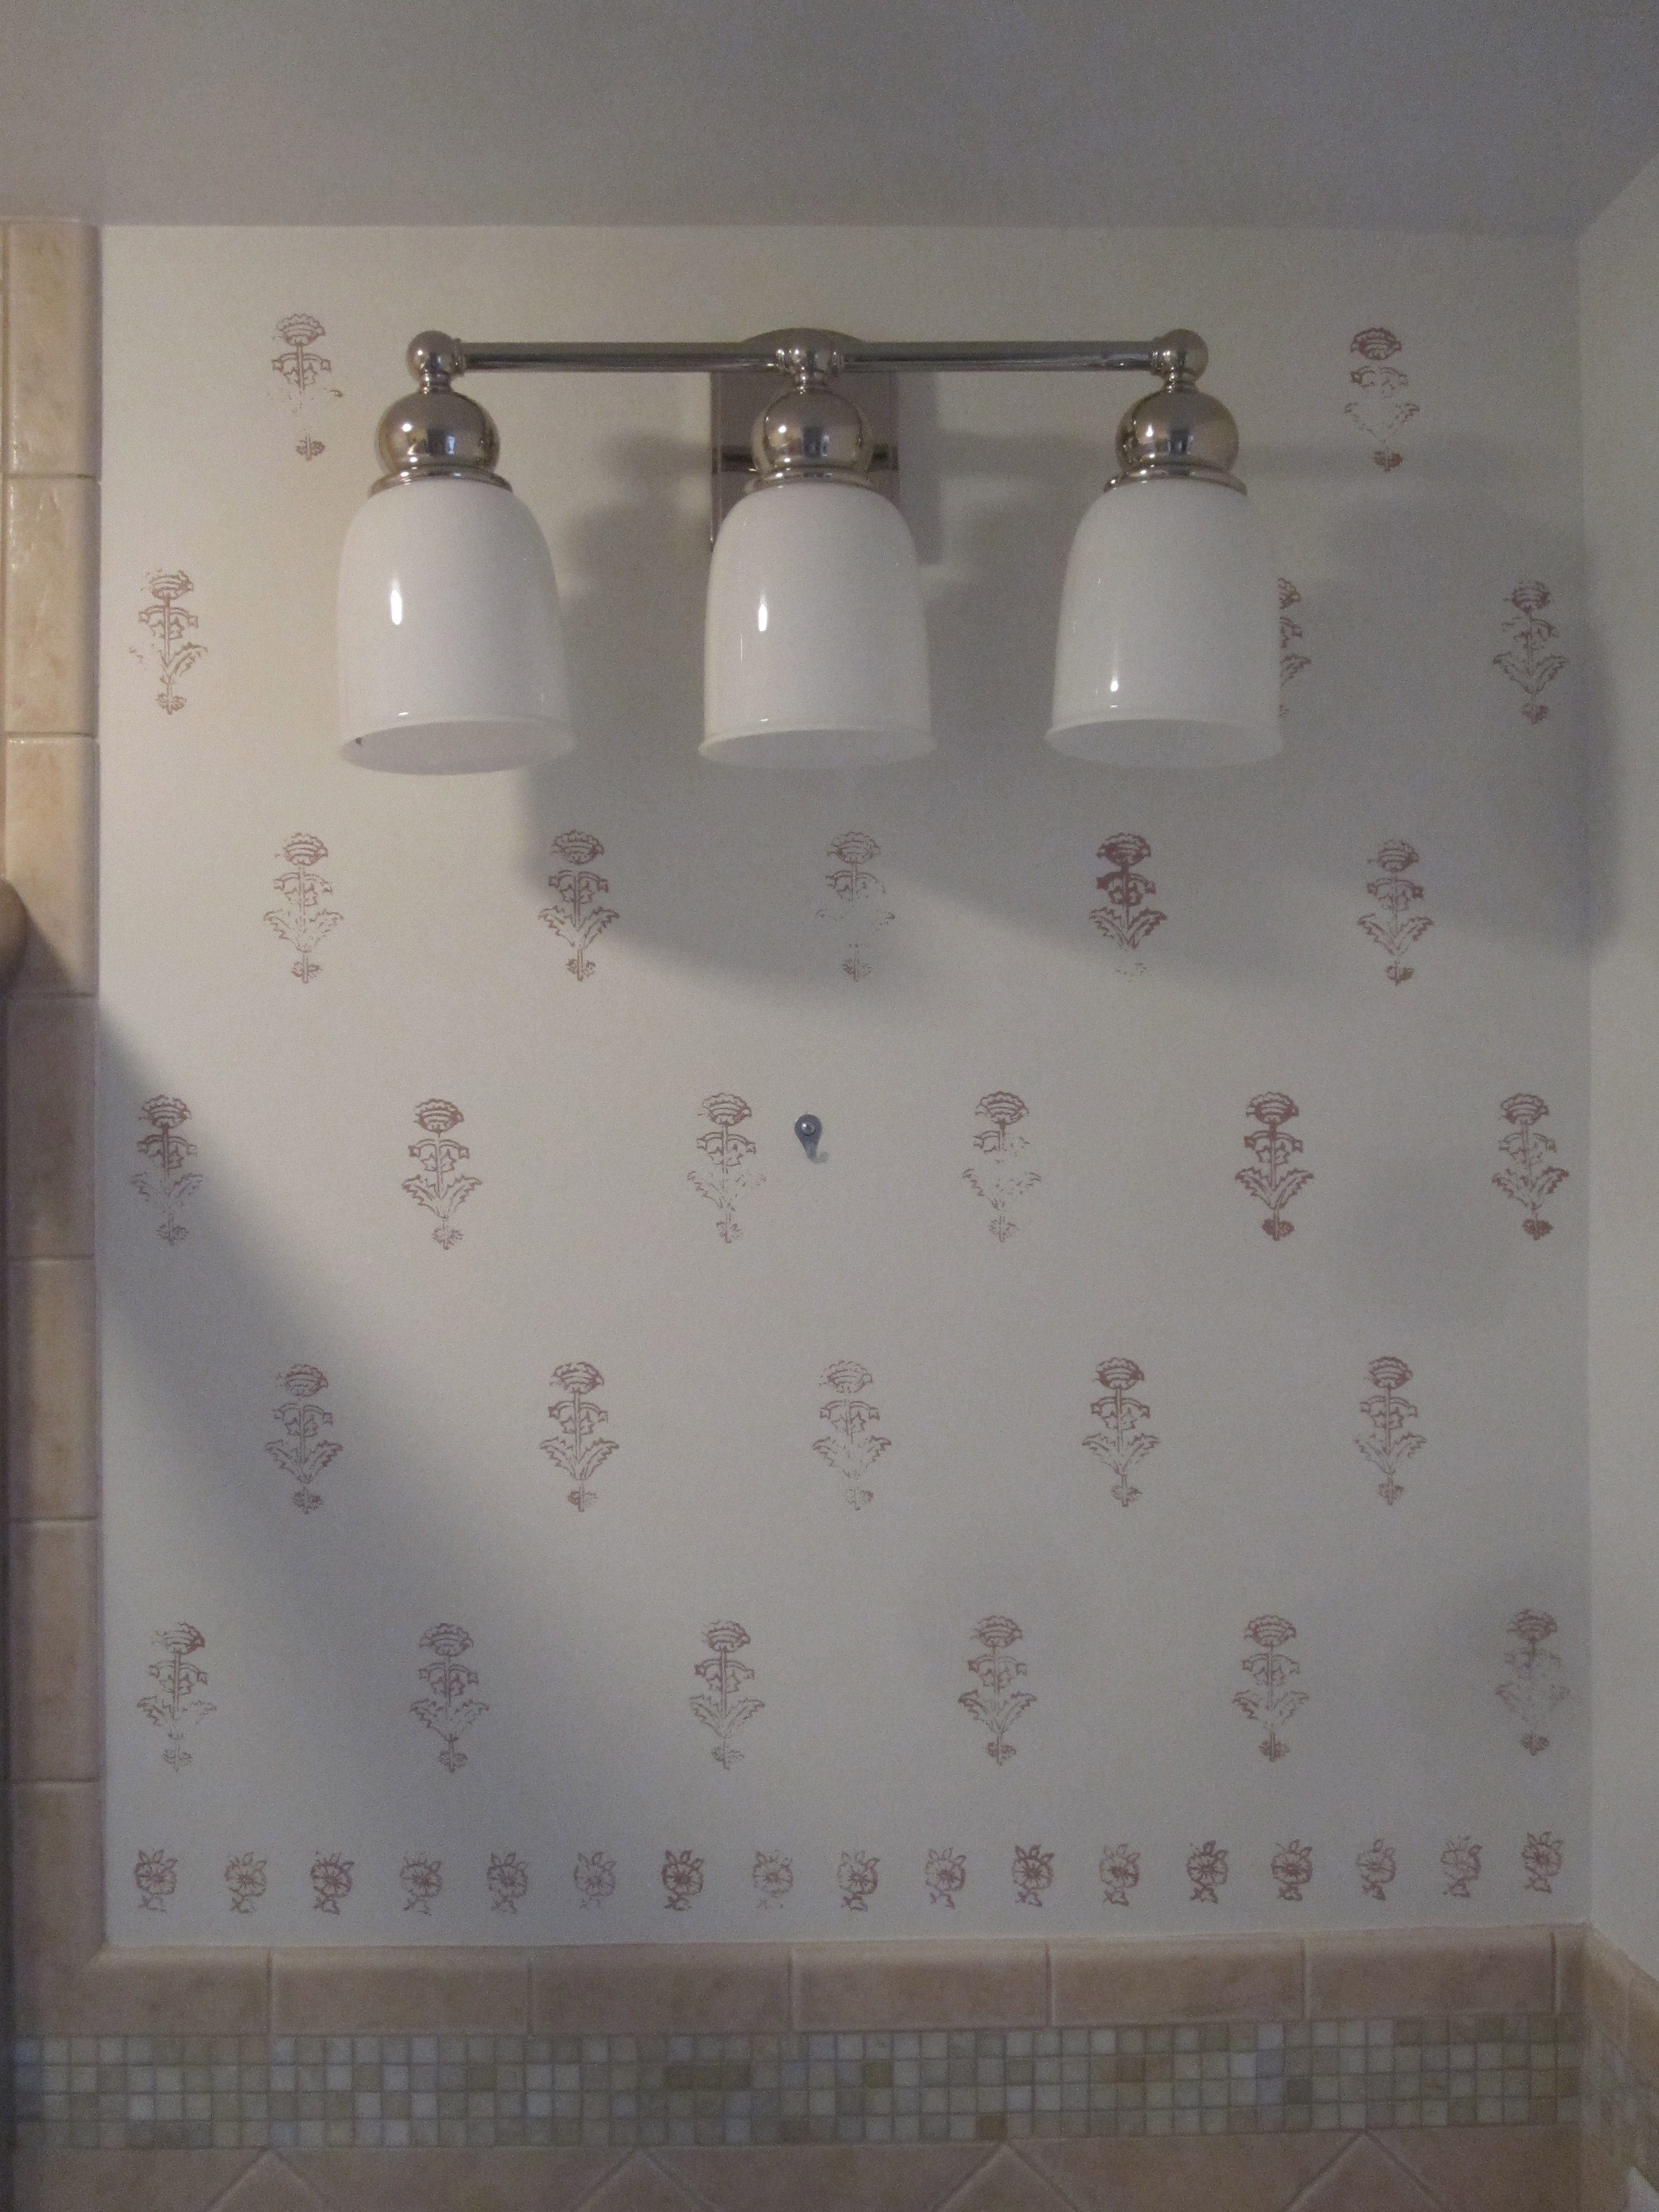
We took turns and painted the bathroom all in one evening. Sweet husband would work with a T-square and level and make tiny pencil registration marks (which were so small I couldn’t photograph them) on one wall and then I would paint there. Then we would switch off for the next wall. I didn’t realize how physically exhausting this would be, but it was like an extreme workout with a few hundred lunges and squats – squat and roll the paint, climb the stepstool, push with my arms raised, climb back down, squat again. Days later and I am still extremely sore.
Here is a little video – totally unrehearsed and you can hear how tired I am as I am almost slurring my words – but in the heat of working we forgot to take any more footage. Painting on the wall was very different from painting on the poster board as the wall was much harder and absorbed less paint and I needed to really work it on by pressing, rocking and banging. I even got adept at making repairs by adding paint to the block only in the spots that hadn’t printed well.
As I said before, having the design perfectly planned and marked on the wall made this project much easier than it would have been and guaranteed a great result.
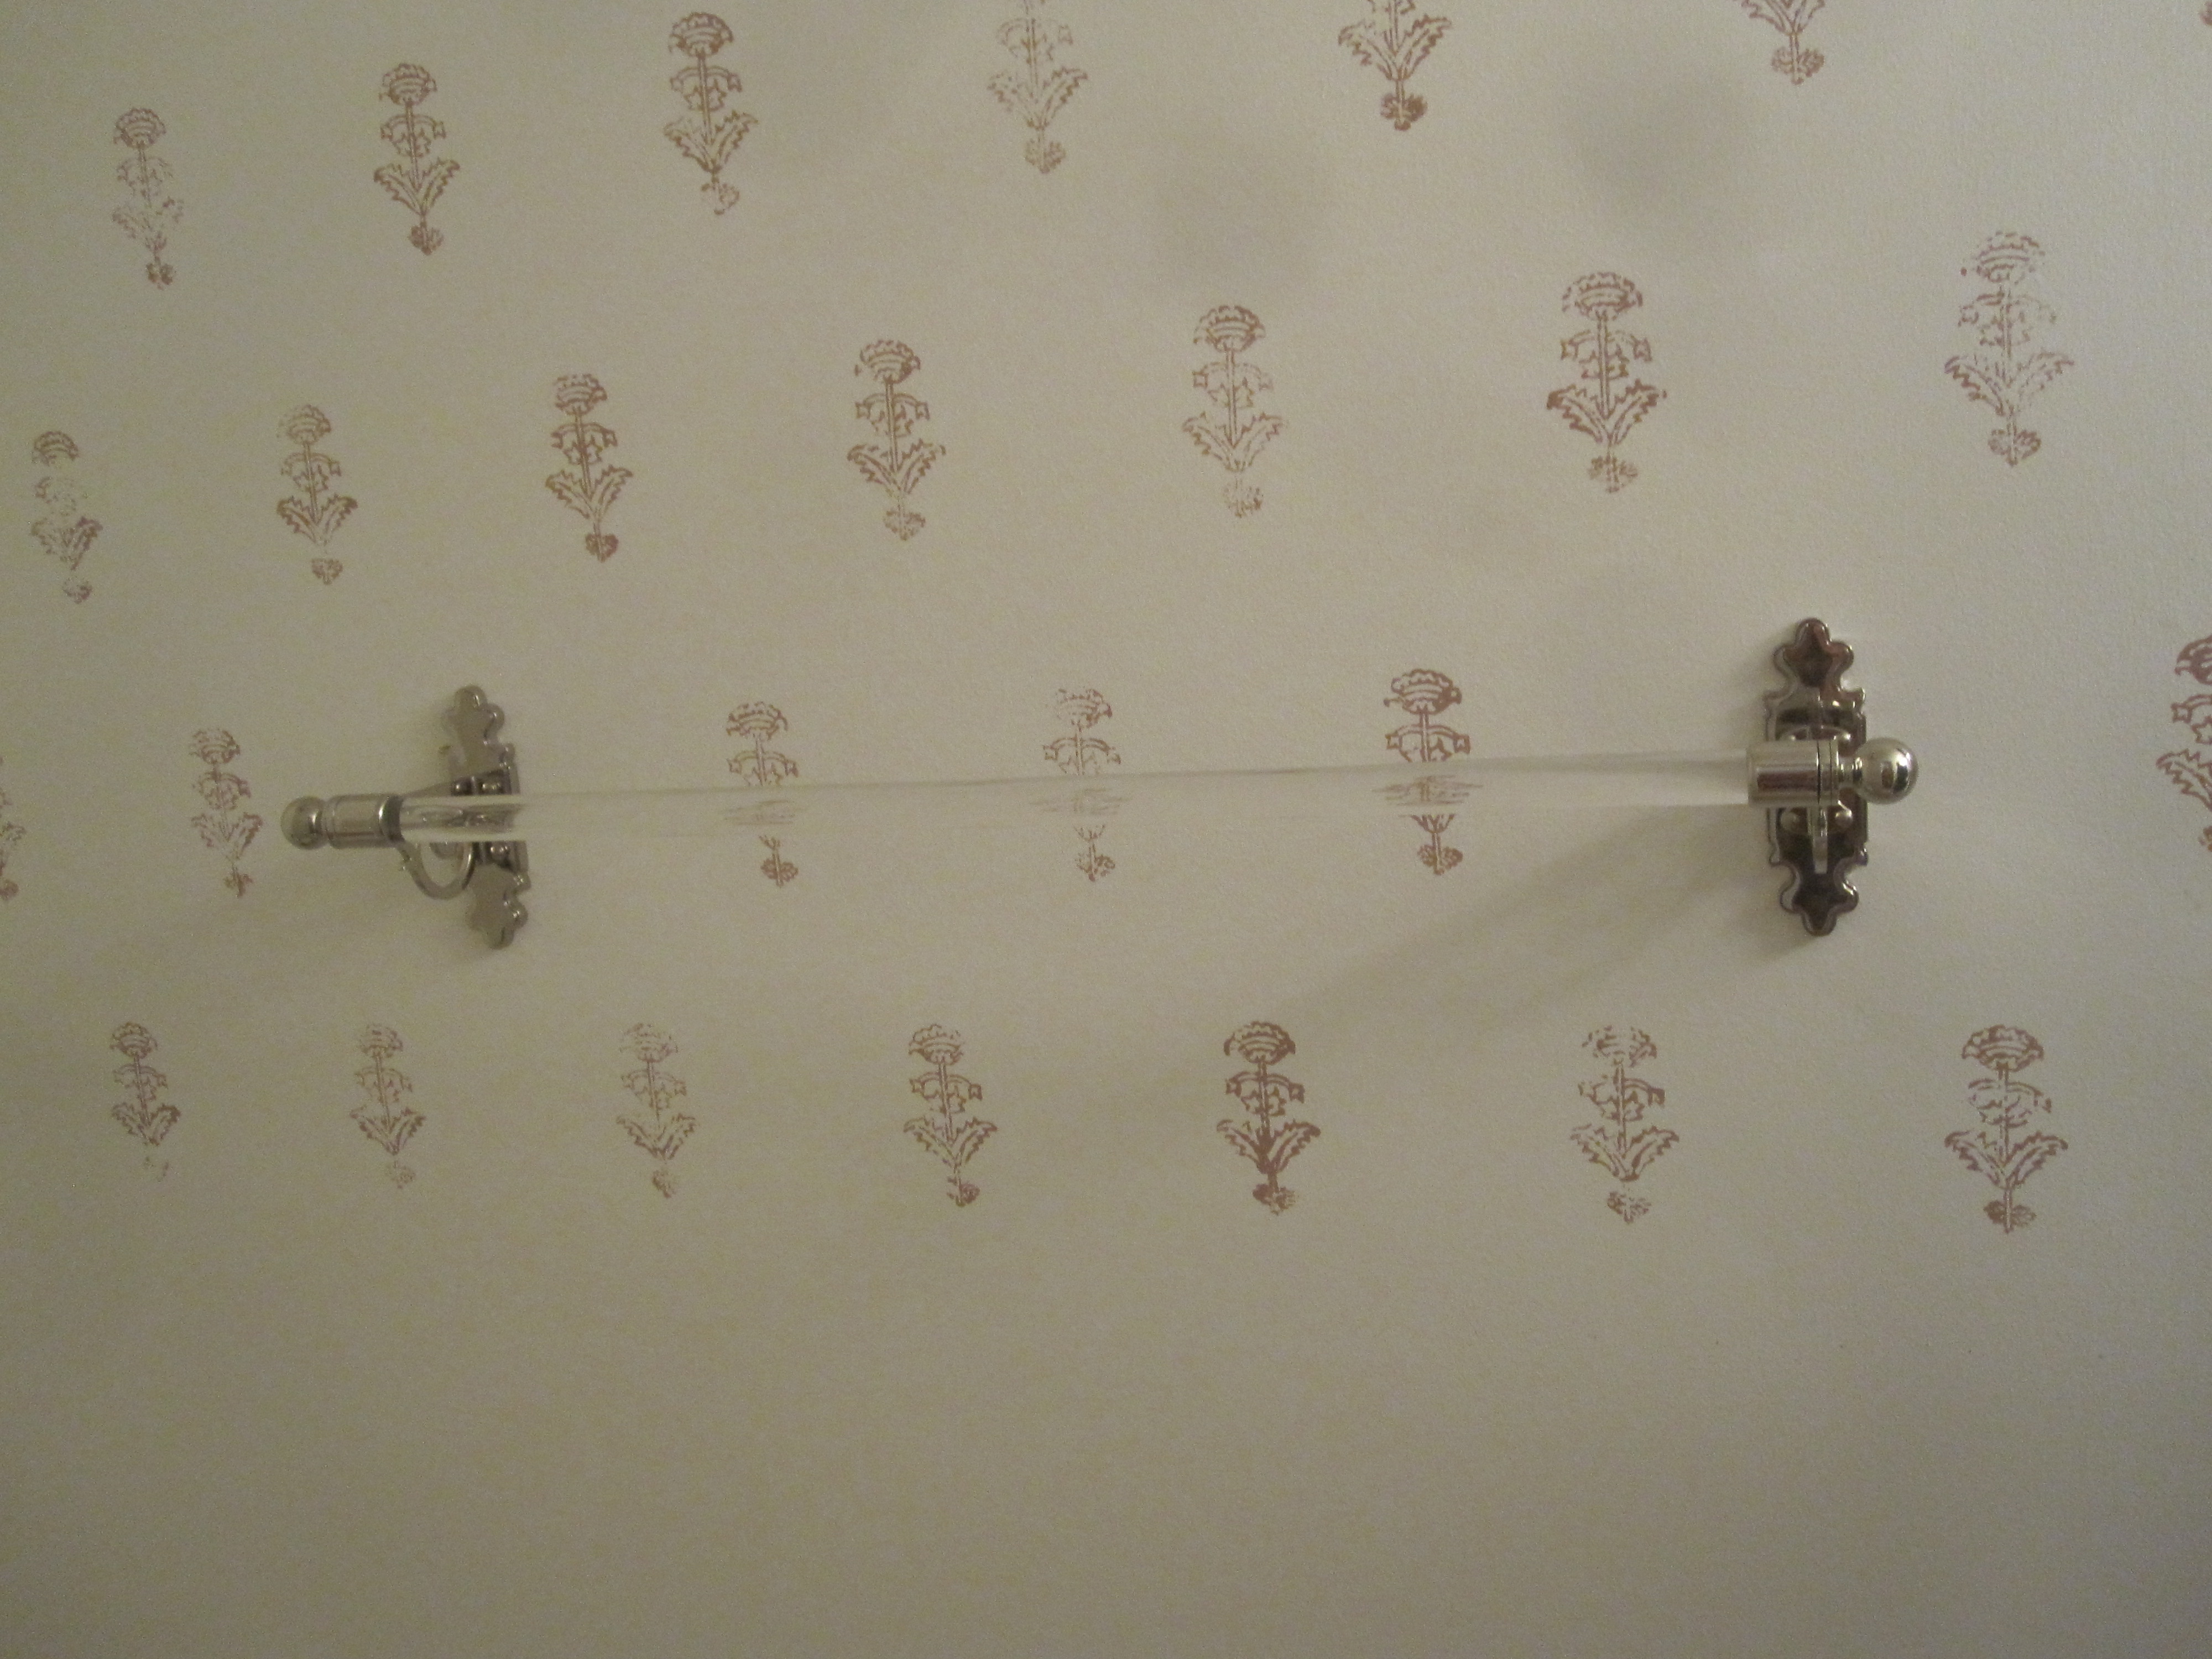
We even went so far as to plan out the exact location and dimensions of the towel bar and did not print there, leaving the space perfectly clear.
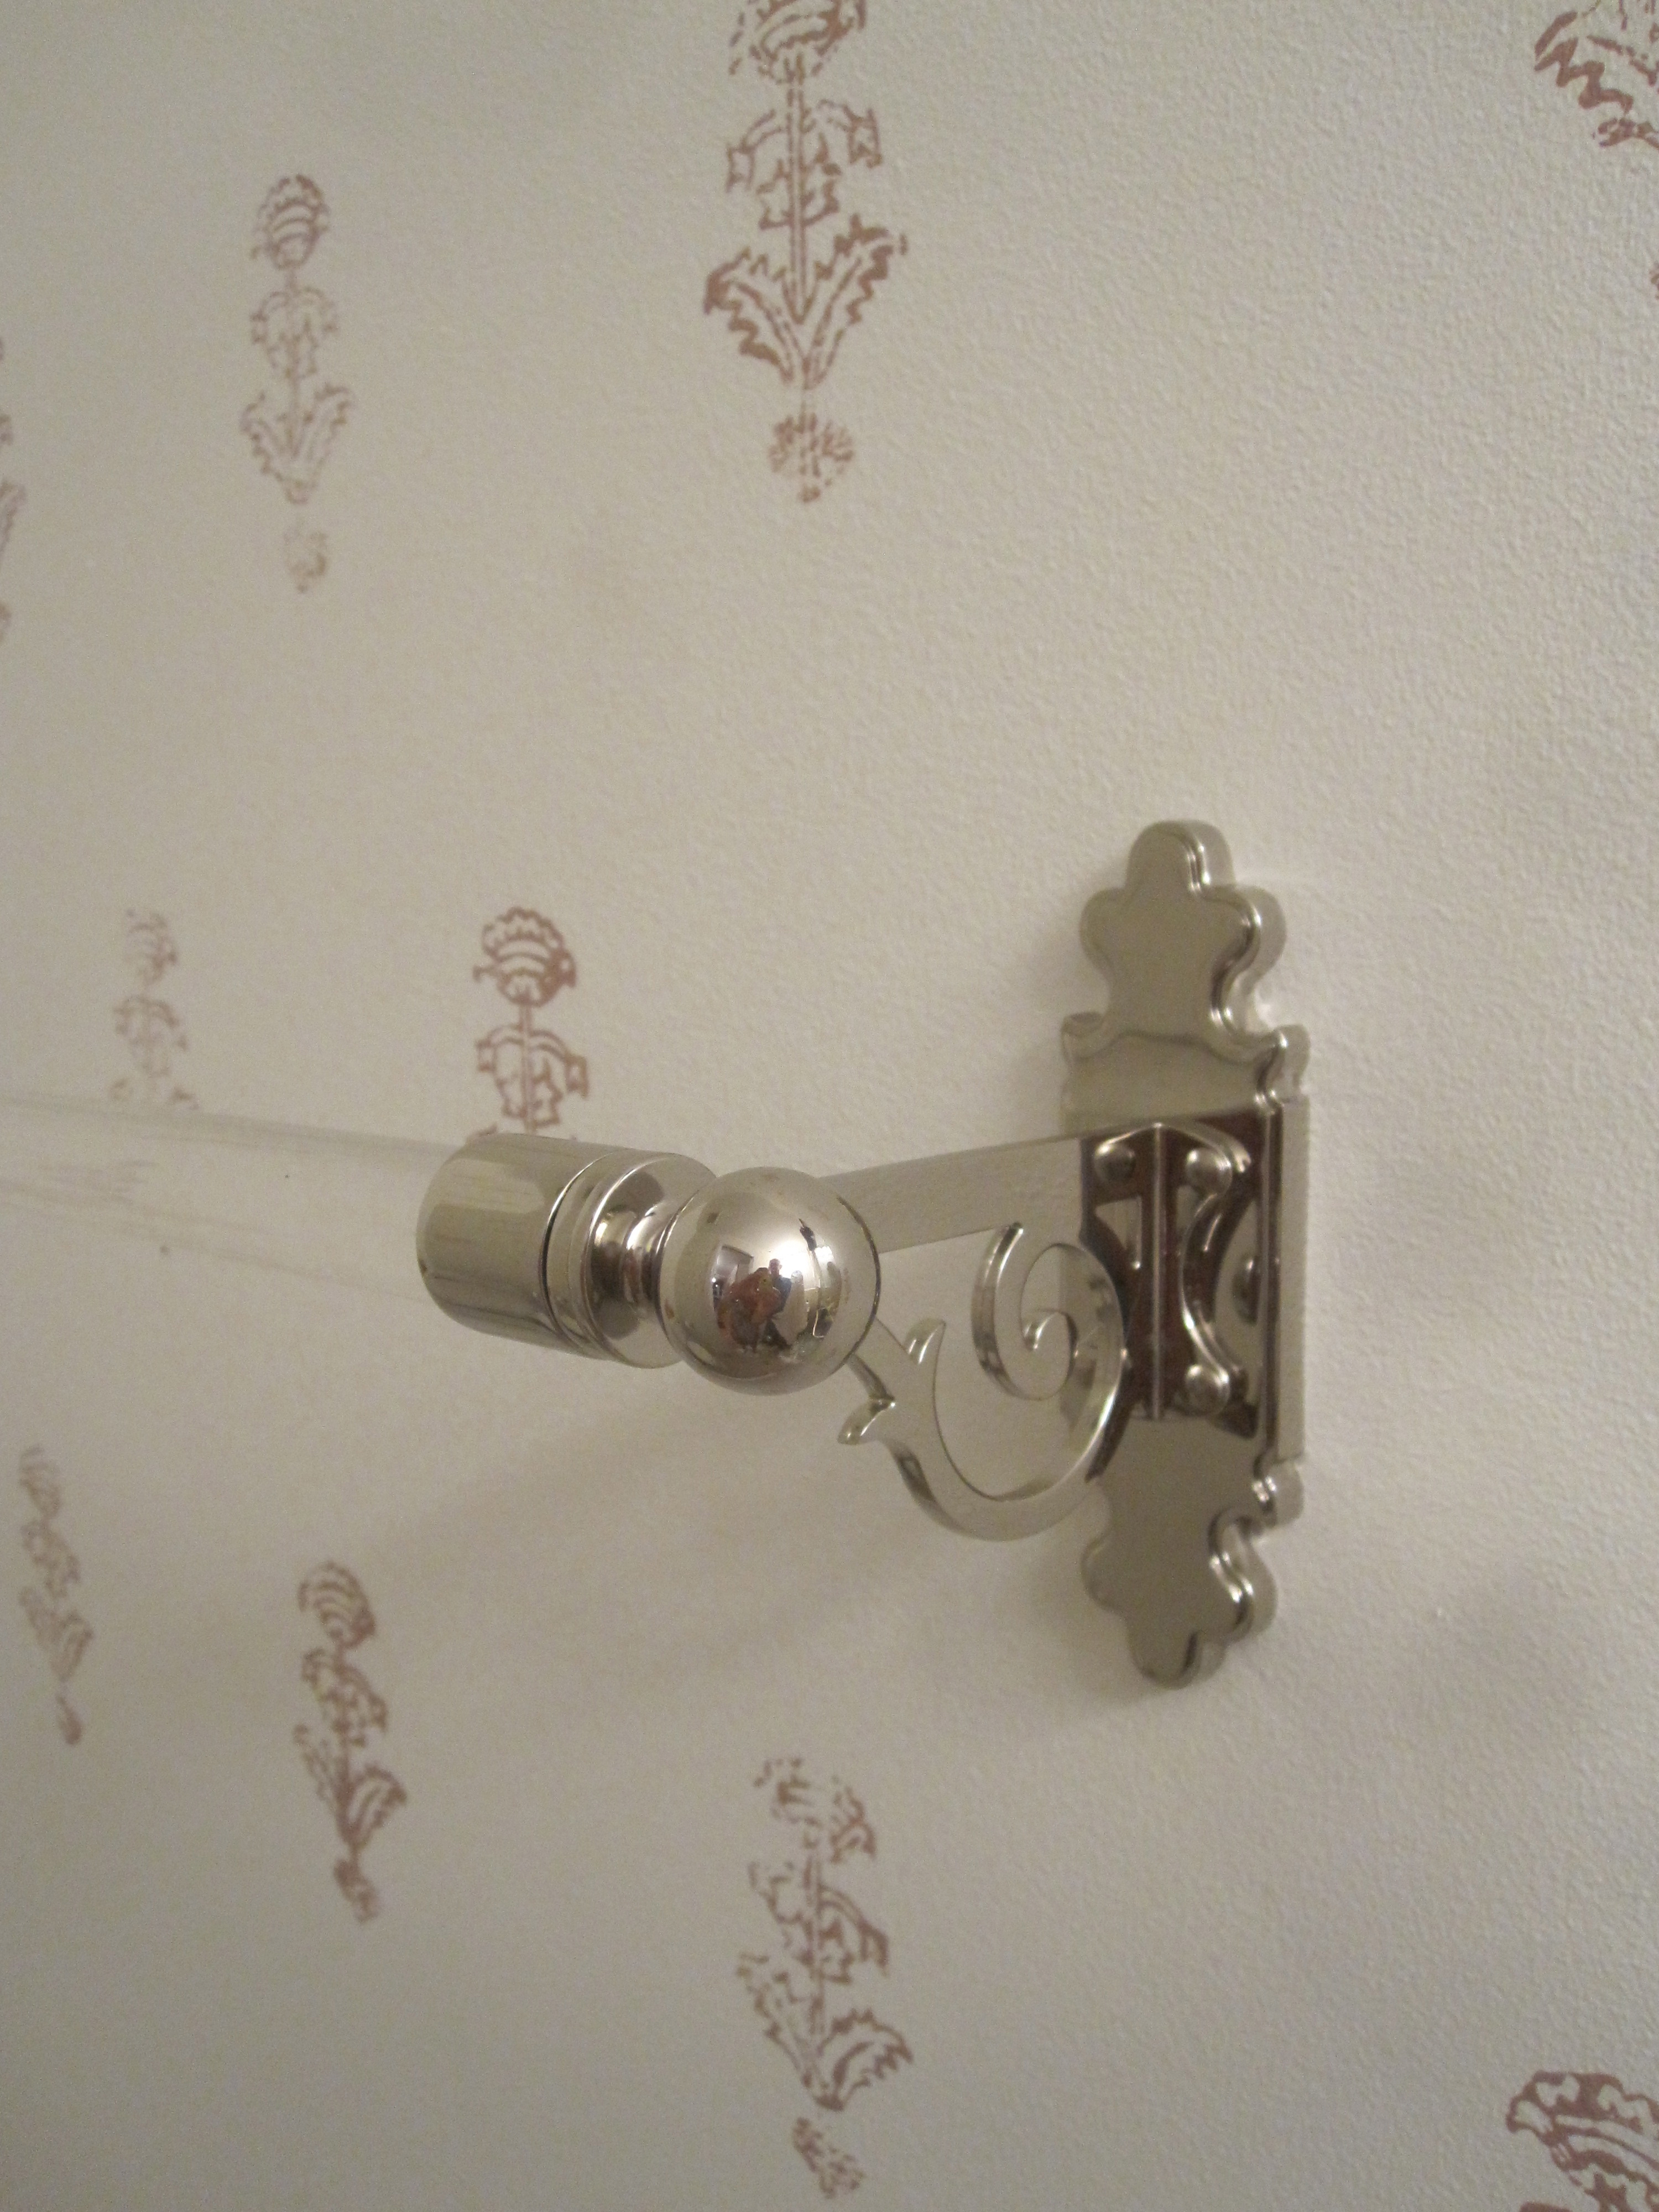
How pretty and perfect is this Florence glass towel bar from Pottery Barn? The shape of the escutcheon mimics the shape of the flowers. More on all the accessory details in the final reveal post!
I am holding back on photos for one final post showing the whole bathroom, so just keep in mind that none of these photos do justice to the room or how fabulous the painting came out. It is softer and prettier than any actual wallpaper would have been!
Master Bathroom Related Posts:
Renovation Report…Do You Throw Good Money After Bad? Thoughts on Fixing My Master Bathroom
A Day Too Late…One Perfect Bathroom Photo
Renovation Report…Pocket Door Progress
Renovation Report…Vanity Dreams or Vanity Reality?



Great job and teamwork! Looks fantastic and boy, do you have steady hands!
Thanks! My arms are still shaky with muscle soreness!
Looks fantastic and nice tan! Can’t wait to see the big reveal.
Coming soon. No vanity thought 🙁
Looks great~ Can’t wait to see the finished product!
Congratulations to you and your sweet husband – I’m just thrilled to see the final project. What a labor of love, and it looks beautiful. Now I REALLY feel like I have to do something with the elephant block I bought!
Fabric and make a throw pillow?
WOW!!!! I’m so impressed with all the work you did, and look forward to seeing it!
Amazing! Just like you! xoox
Wait till you see the whole thing – when you visit that is!!!
One word: fabulous! Ok, more words are needed. I love that you actually used the blocks you found in Singapore. How cool is that. And I just discovered you on Pinterest. Am following your boards. Hello, friend 🙂
xoxo,
Loi
I think you’ll really like how it turned out – that post coming soon! And I will have to go check out your Pinterest boards now too!
Yay blocks, yay Tom!. Can’t wait to see in person next summer
xxLinda
Wow, what a process. It turned out gorgeous. I can’t get over how incredibly similar to the Madame de Montreuil wallpaper it is, great eye in finding the wood block. Congrats to a fabulous husband/wife team!!
Yay! I absolutely LOVE this. I bet you are thrilled. I would be…
Camille
P.S. I have an Indian printing block and I too have tried to use it (on cloth) with little success. Brayer. Aha!
What a great idea! We love the look of Les Indiennes too!
Most of us have no idea how challenging one of these great ideas will be, but with trial and error, and the help of your husband, your project turned out very well. The expensive wallpaper may be wonderful, but this is truly original. It happens an Indian blogger I read recently posted about this ancient technique:
http://www.rangdecor.blogspot.com/2012/08/art-crafts-of-india-ajrakh-or-ajarakh.html
Great minds think alike! I read her blog too!
Is It Copy Cat Chic? Or Is It Just Copying? | Tokyo Jinja
[…] copied, again a similar question to the one above. When I think back to the block print flower I used on the walls in my bathroom, I do know I have seen that particular flower pattern before and that there were multiples of the […]