

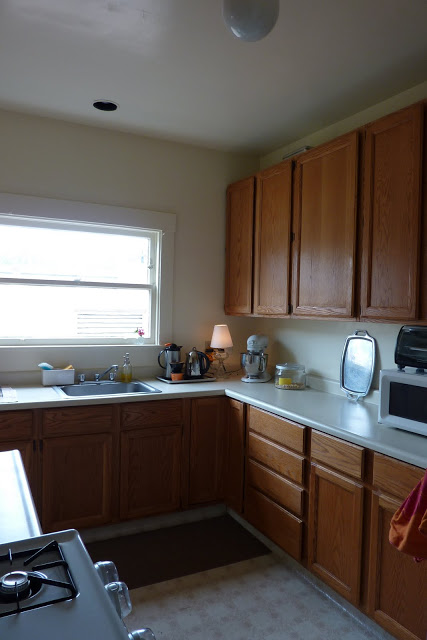
Each and every person who visits our house finds one thing about the kitchen more egregious than another. For my mom, the sink always looks and feels dirty. My brother can’t stand the false vent over the stove. Some people hate the cabinets, others the floor. You already know I can’t stand the behemoth fridge. But if I change just one particularly bad item, it doesn’t fix all the rest and may well not be what I want for the long term – just a stop-gap improvement. And of course keep in mind that there is lovely wooden floor under the linoleum that would involve a full gut job to get to.
But lots of other people say “just live with it” or “be environmentally friendly” which is definitely worth considering. If we don’t gut it (and that is still on the table) or while we wait for the magic salvage items to appear, there is much that could be done to continue to improve the space. I have come up with a cheap and cheerful renovation plan – but the key to it is that I don’t want to spend more than $500. Seriously! Anymore than that and it starts moving towards a real renovation, which I don’t want to do piecemeal. That is the only way it makes sense, otherwise, we should go ahead and just renovate the whole thing.
A number of blogger friends have made silk purses out of their sow’s ear kitchens with very very small budgets, including Camille’s before…
…and after.

Steve’s kitchen before…
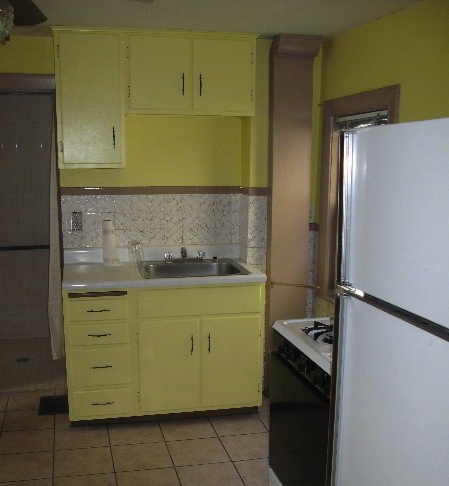
…and after. Both used every trick of the trade, painting things that aren’t usually painted, styling techniques and eye-foolers – note they both have mirrors hanging on their backsplashes. You can read more about their journeys at their respective blogs, A Vintique Object and An Urban Cottage, where both happen to be talking about the kind of kitchens I like this week!

My plan rests on making my personal peace with the almond color of the appliances and the Benjamin Moore Linen White and thinking about it not as a compromise color, but as a real color, much the way I would with gray. If you told me I would have a gray and white kitchen, I would be perfectly happy, so the idea is to think of this as a beige and white kitchen. To add to it I would bring in warm metals like aged brass and copper (and in preparation I lugged all my copper pots back from Tokyo last year) and textured materials like baskets and wood cutting boards.
The first step is improving the cabinets and after being at a loss of what to do for a few years (laminate with wood edges! Impossible to paint!) I came across an incredible and easy DIY kitchen make over on The Sweetest Digs. In a three-part post (here, here and here) Gemma and Guy utterly transformed their kitchen with similar cabinets for almost nothing. They went from this…
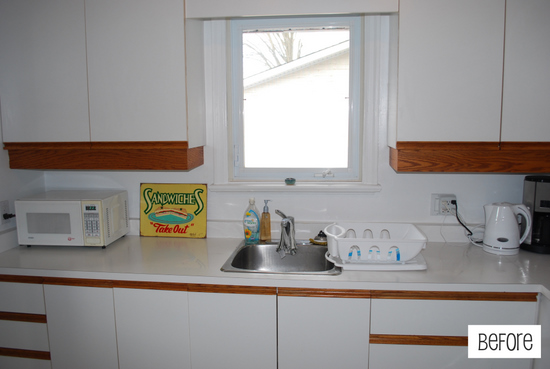
…to this by simply painting out the wooden bits and adding new hardware. The ugly cabinets are still there, but so much less noticeable without those delineating wooden edges.

I could use the Linen White to paint out the wood parts of the cabinets and perhaps add some inexpensive but charming unlacquered brass pulls from Martha Stewart’s line for Home Depot (and I just noticed but these might be the very same ones Camille used in her kitchen.)


Gemma and Guy also did a bold peel-and-stick tile pattern on the floor, which wouldn’t be suitable at our place, but perhaps some kind of cork or a cream and white checkerboard would feel fresh.

Peel and stick flooring would let us cover the hole under the cabinet piece we would like to remove and we could get a great repurposed piece to use as an island. No matter what we end up doing in the kitchen, some kind of interesting island is a definite. I’ve written an entire post on that subject before and you can find it here. But how about something like this?

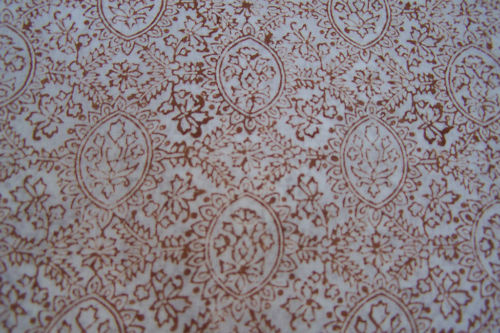
I’ve got lots of stash hidden away over the years (and I consider it all amortized in terms of this project) like this John Robshaw block printed cotton voile called Shree Teak (which he used to cover the lampshades in his bedroom by the way). It would make lovely cafe curtains hung from simple brass rods. Until we are ready to build out the rest of the pantry, I have enough to make a curtain to cover the doorway of that too.
Another coup is this pair of ribbed industrial pendants I probably bought and put away 15 years ago. I rediscovered them in the basement (along with other goodies) and I love them just as much as I did when I bought them. The only expense involved with them is the electrician to hang them. And again, whether I go with a cheap and cheerful or a full gut, these are definitely going up!

Some vintage brass cookie cutters from the Oedo Antiques Market in Tokyo would look sweet in there too!

If I want to be ambitious, we could take down the upper cabinets and hang simple wooden shelves. One again, that’s an idea I am serious about no matter what plan we go with! Heather Bullard has a lovely kitchen with a corner nook by the window that I could mimic between the window and refrigerator. I even have that basket and plenty of white ironstone already. And look – its beige and white and pretty!

So that’s plan number one. It’s cheap, but it involves a lot of labor on my part. I’d need to take down upper cabinets and add wooden shelves, peel and stick a new floor, paint out wood edges of cabinets and install pulls, sew and hang cafe curtains, hire electrician to hang the pendant lights and finally style and decorate with accessories. What do you think? You might want to weigh in now, or you might want to wait for tomorrow’s post to see which plan you vote for.
Related Posts:
Beach House Kitchen Diary Part 1…Before and Currently
Beach House Kitchen Diary Part 2…What I Wish Was Here Originally
My vote is to go to the beach and relax and enjoy your paradise there. Read a book in your lounge chair and soak up the shore with your wonderful girls. Leave the kitchen for next summer or the next. Sound like a plan??
Sounds like you have a great plan in place, but I’ll wait to see tomorrow’s post before voting. 🙂 Sometimes it is a curse to be design obsessed, isn’t it? I totally get your desire to make a change.
Hope you’ve had a good visit to NJ?
All great ideas, but I would wait and do it all at once. Enjoy your time there for now.
I didn’t get an e-mail about this one either! I love what they did with their black and white tile. I have an VERY narrow front hallway and I’ve considered doing horizontal stripes to make it look shorter. That was a really smart move on their part.
Back to you. I have a friend with kitchen that not only has those cabinets, his counter have a wood trim piece on the front. I’ve tried to convince him to sand those down and paint them or stain them white. Something to minimize the difference in color and value. If you’re not going to paint those, adding baskets and cutting boards seem like they were go a long way to making those wood edges seem more like they belong.
Man, my kitchen was fugly.
The creative use of flooring was an affordable way to improve the kitchen. I also think beige and white is a refreshing combination. You can add colorful decor for each season to spice it up.